How to Start Your Own Sweet Potato Slips

Standard

Sweet potatoes love to grow in the heat of Florida summers. At a time when many other crops are struggling, the sweet potato vines spread vigorously.

You can buy sweet potato slips, or you can grow them yourself from a sweet potato.  Maybe you did a project in elementary school where you stuck toothpicks in a sweet potato, then set it in a glass of water to grow leaves and roots. You had to make sure you changed the water or it would get stinky.

I rooted mine differently.

I used the ” Stick it in a Pot and Forget about It” method.

All I did was to take a sweet potato and bury it about halfway in some of my compost. I put the pointy end down and the end that had the little scar above the ground.

DSCN4431

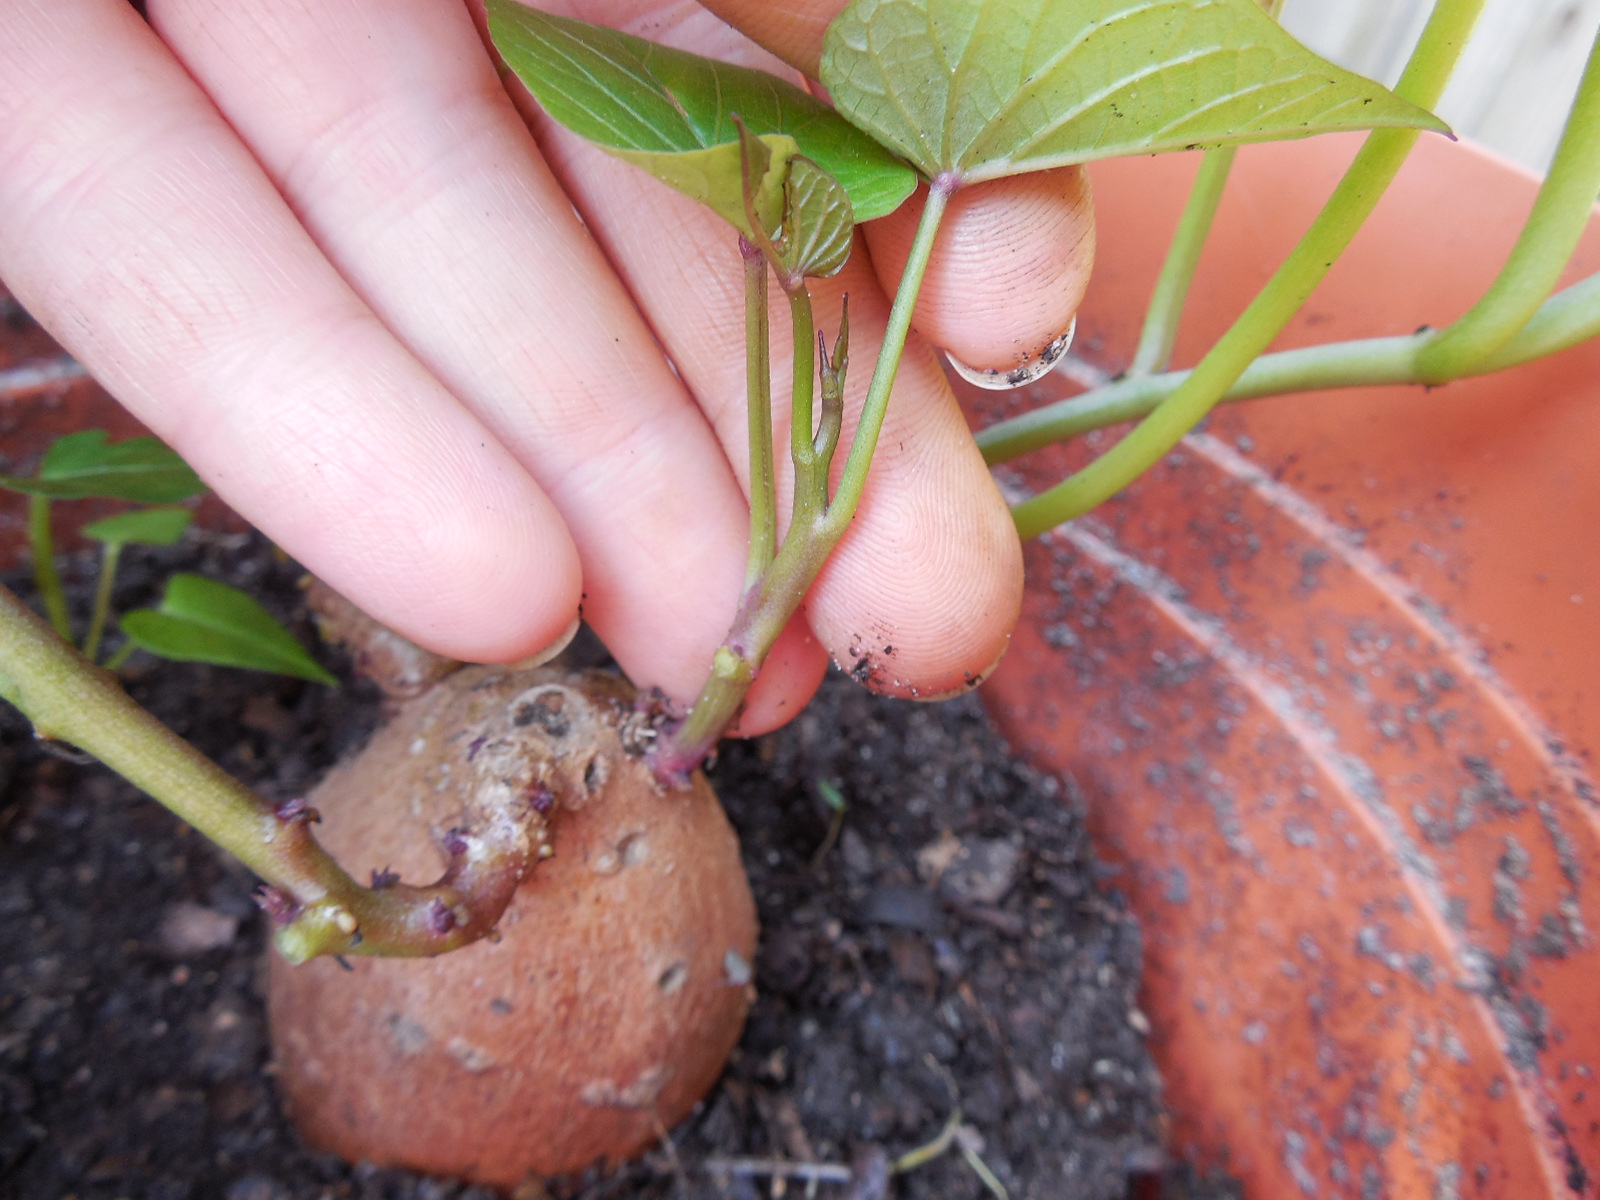
Depending on your sweet potato’s mood and the heat of your climate, you should begin to see green leaves within a few weeks, earlier if your potato was showing signs of sprouting anyway.

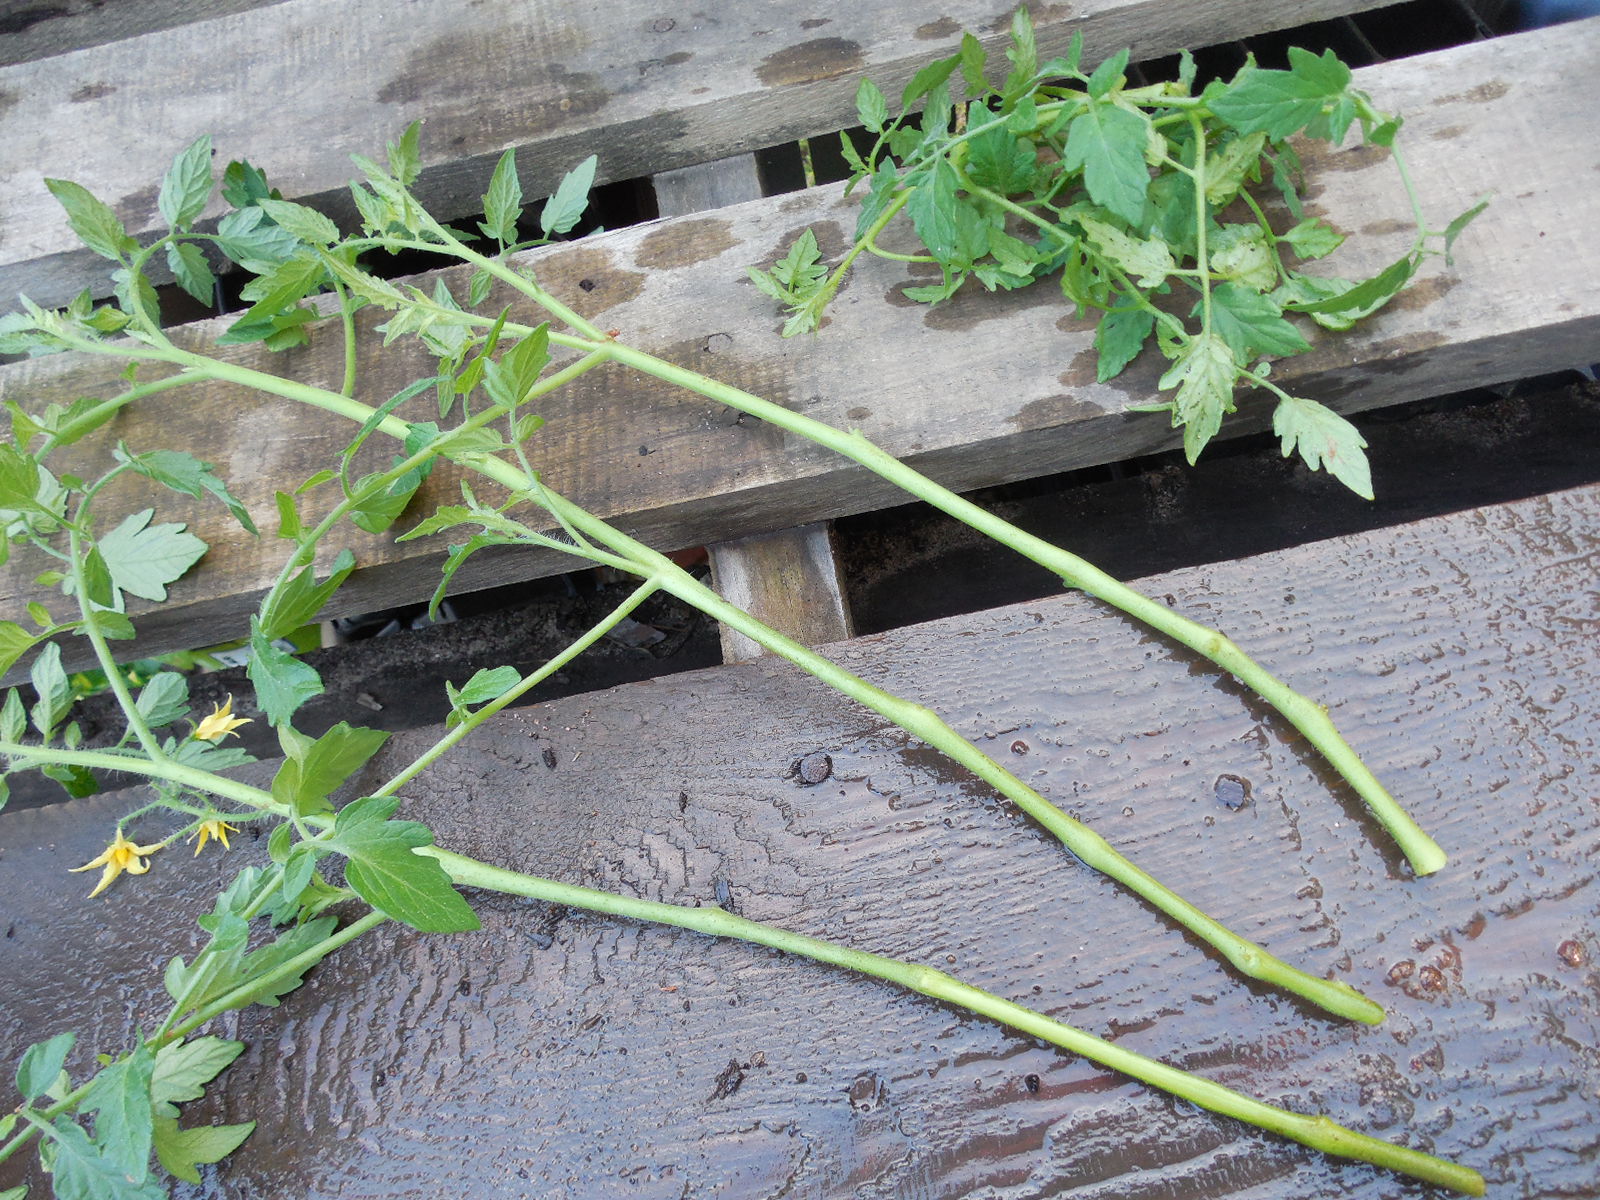
If you have never rooted anything in your life, start with sweet potatoes-they are so easy. Tomatoes are pretty easy to root too, and I have gotten many free tomato plants that way.DSCN4432

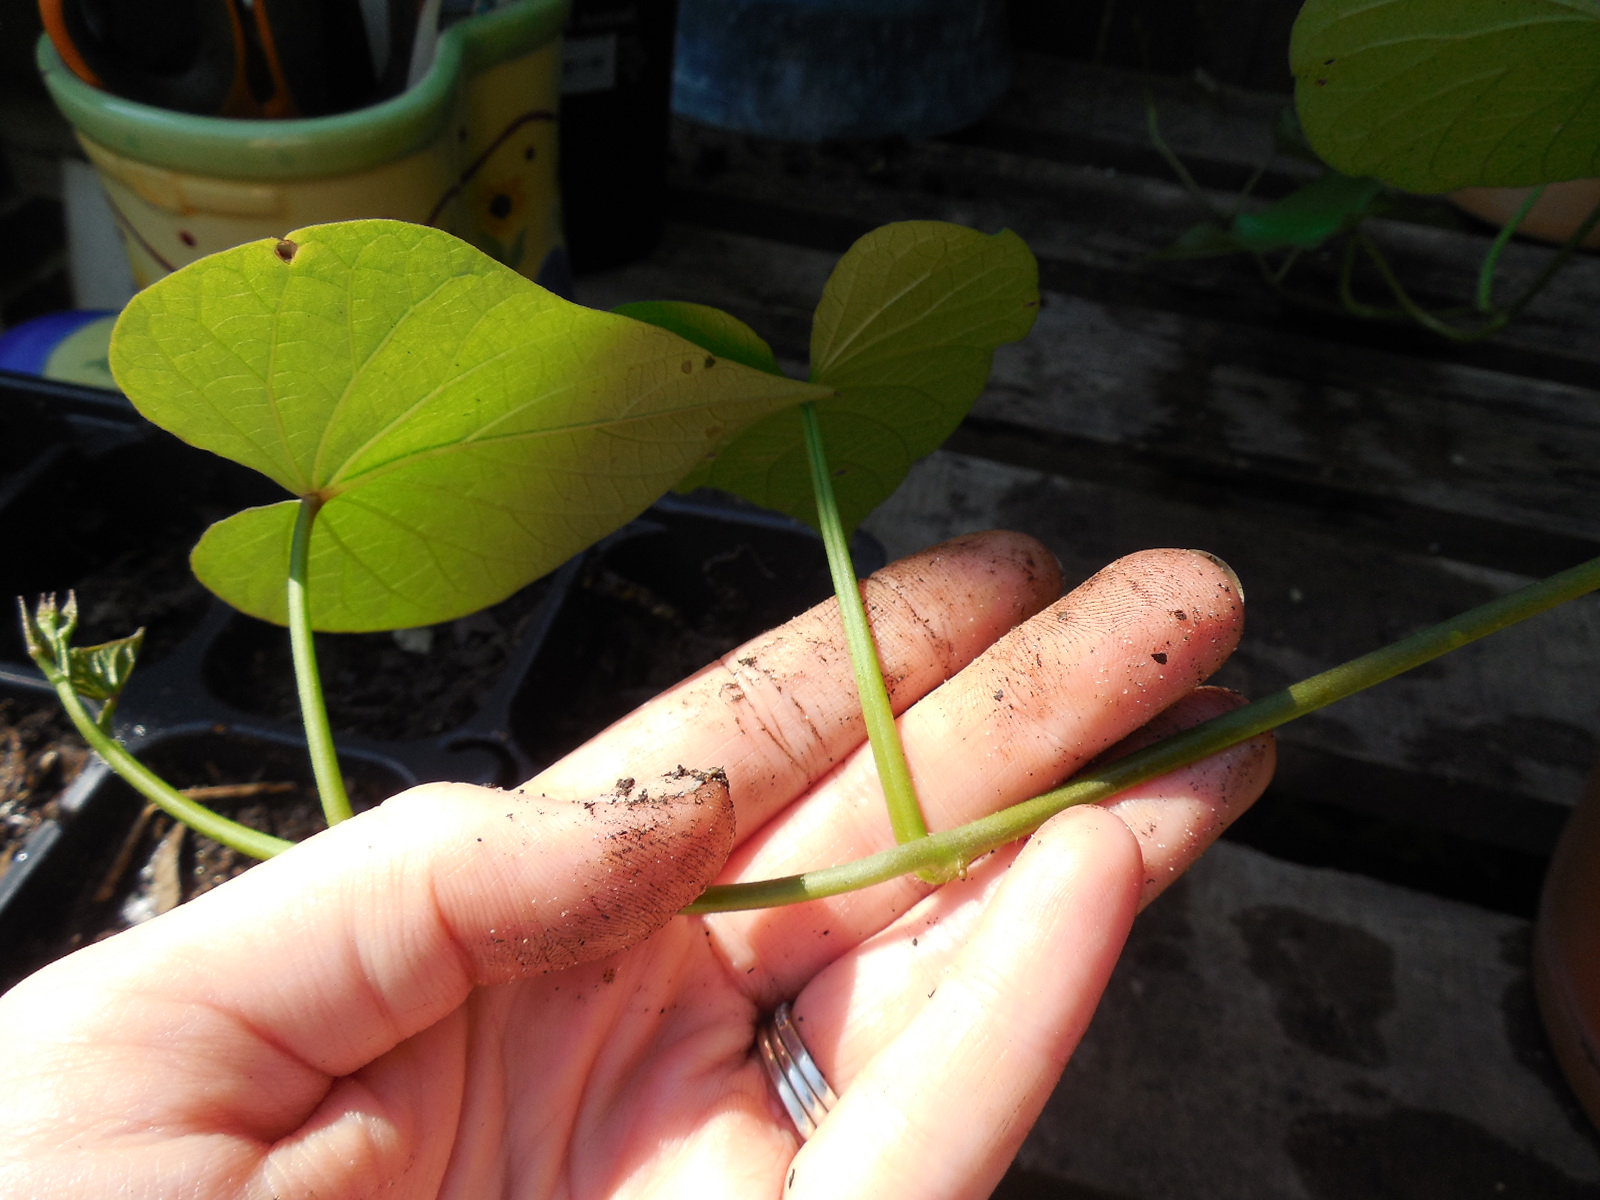
To get your plants, snip off sections of the vine, being sure that you have at least 1 node(intersection of leaf and stem) that you can bury, preferably 2.DSCN4435

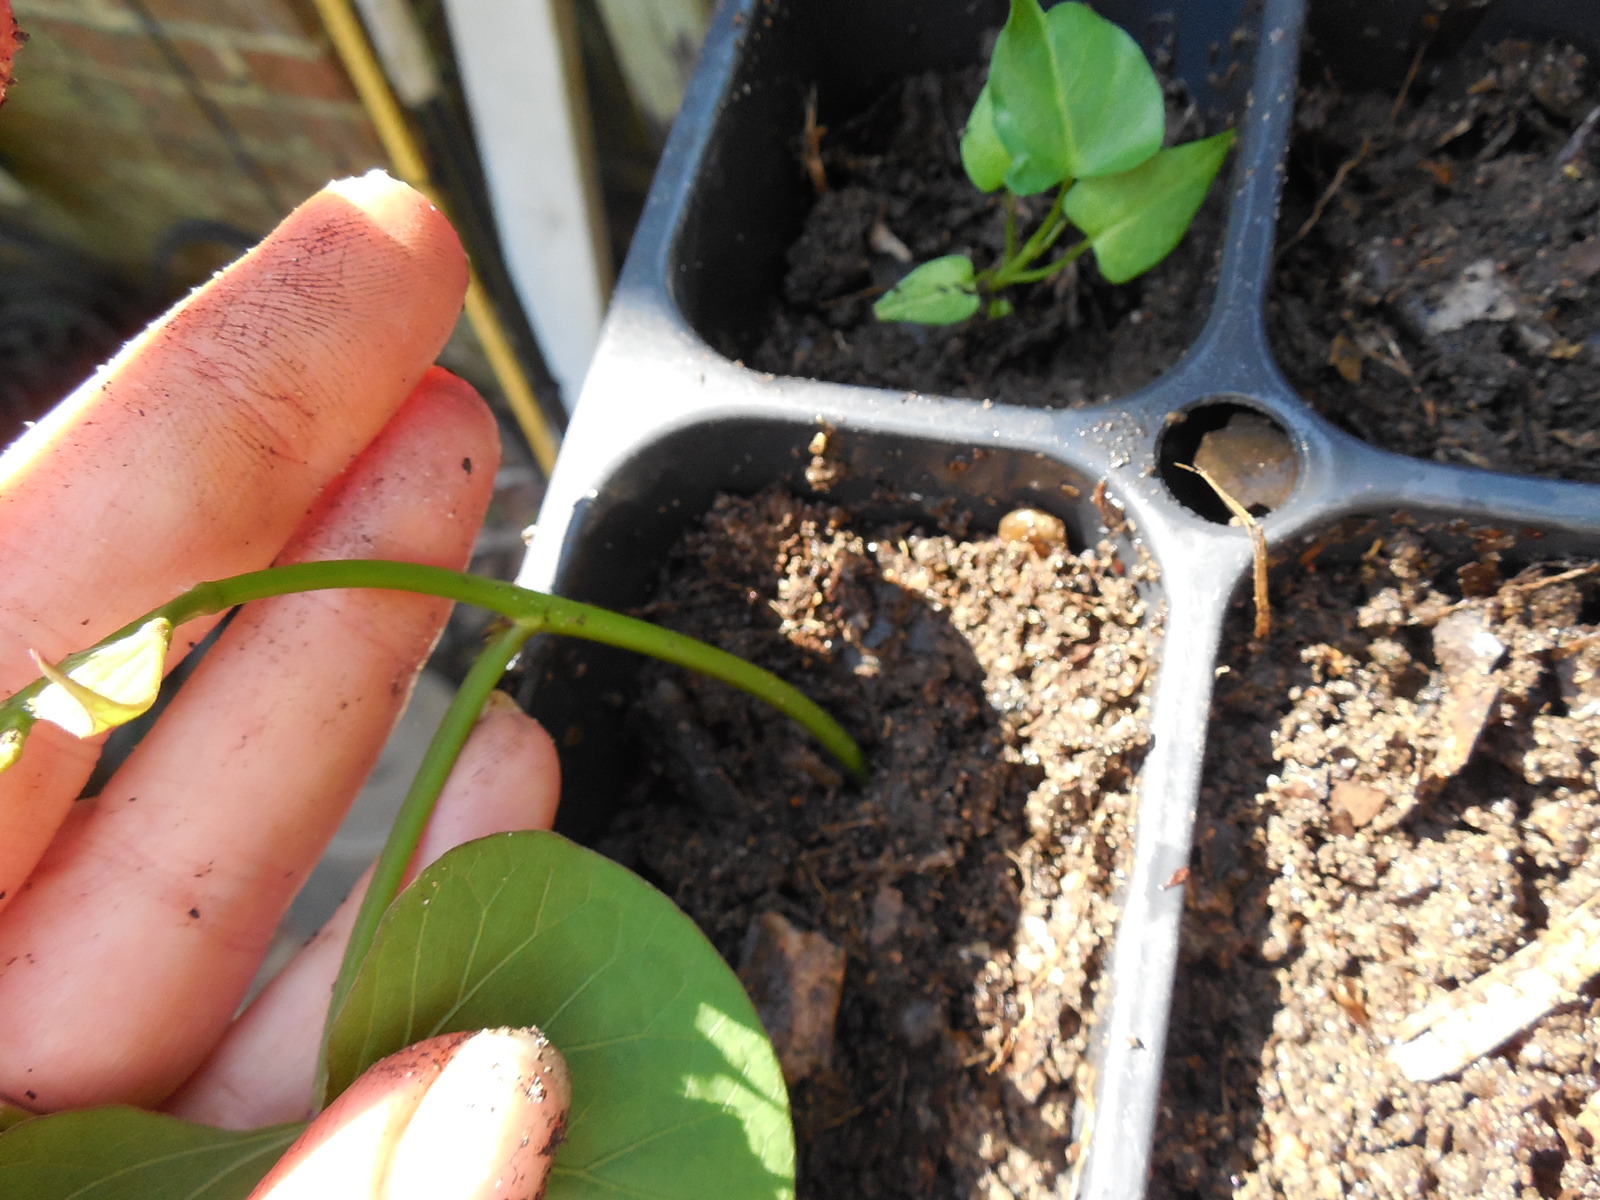
Tear the leaf off of the node and bury the section as deeply as possible. I am sticking my shoots into flats filled with my homemade compost.DSCN4438
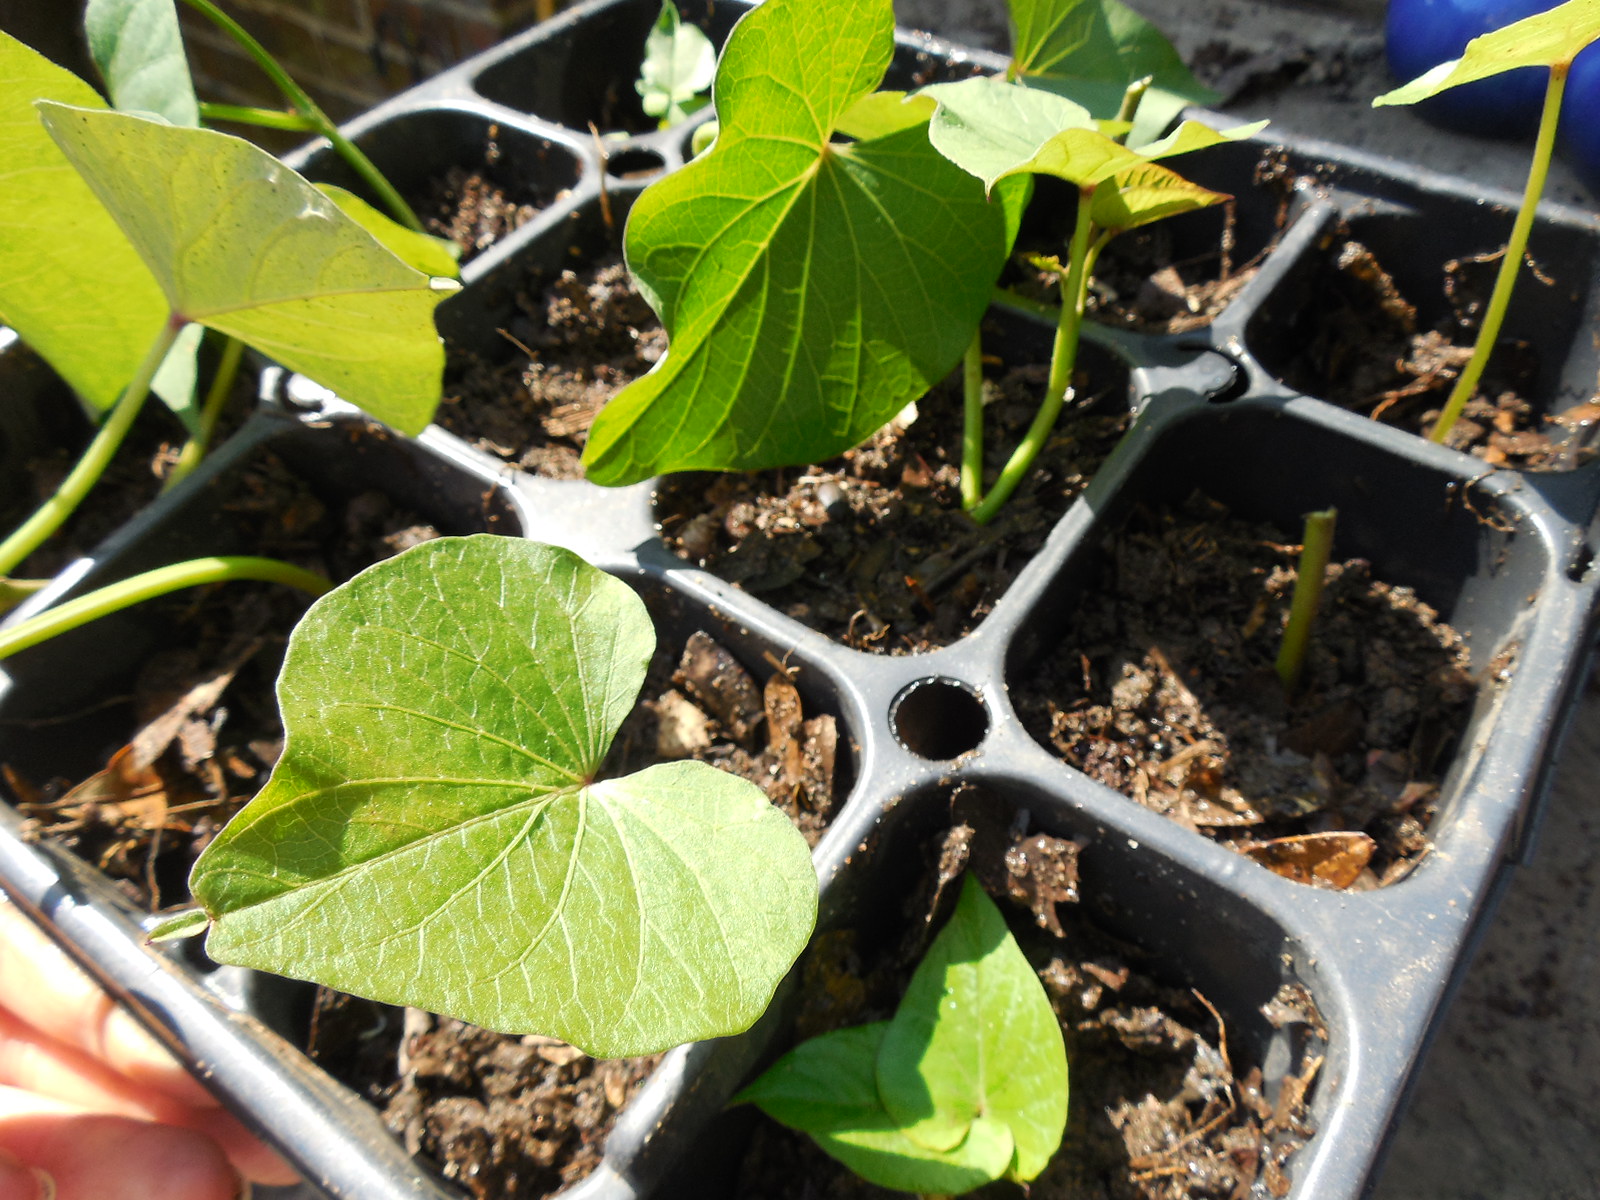
If some of the shoots are short, just rip them off of the potato and poke them in the compost or potting soil. You may think that some of the little sections of stem will not be able to root, but they will surprise you.

DSCN4708

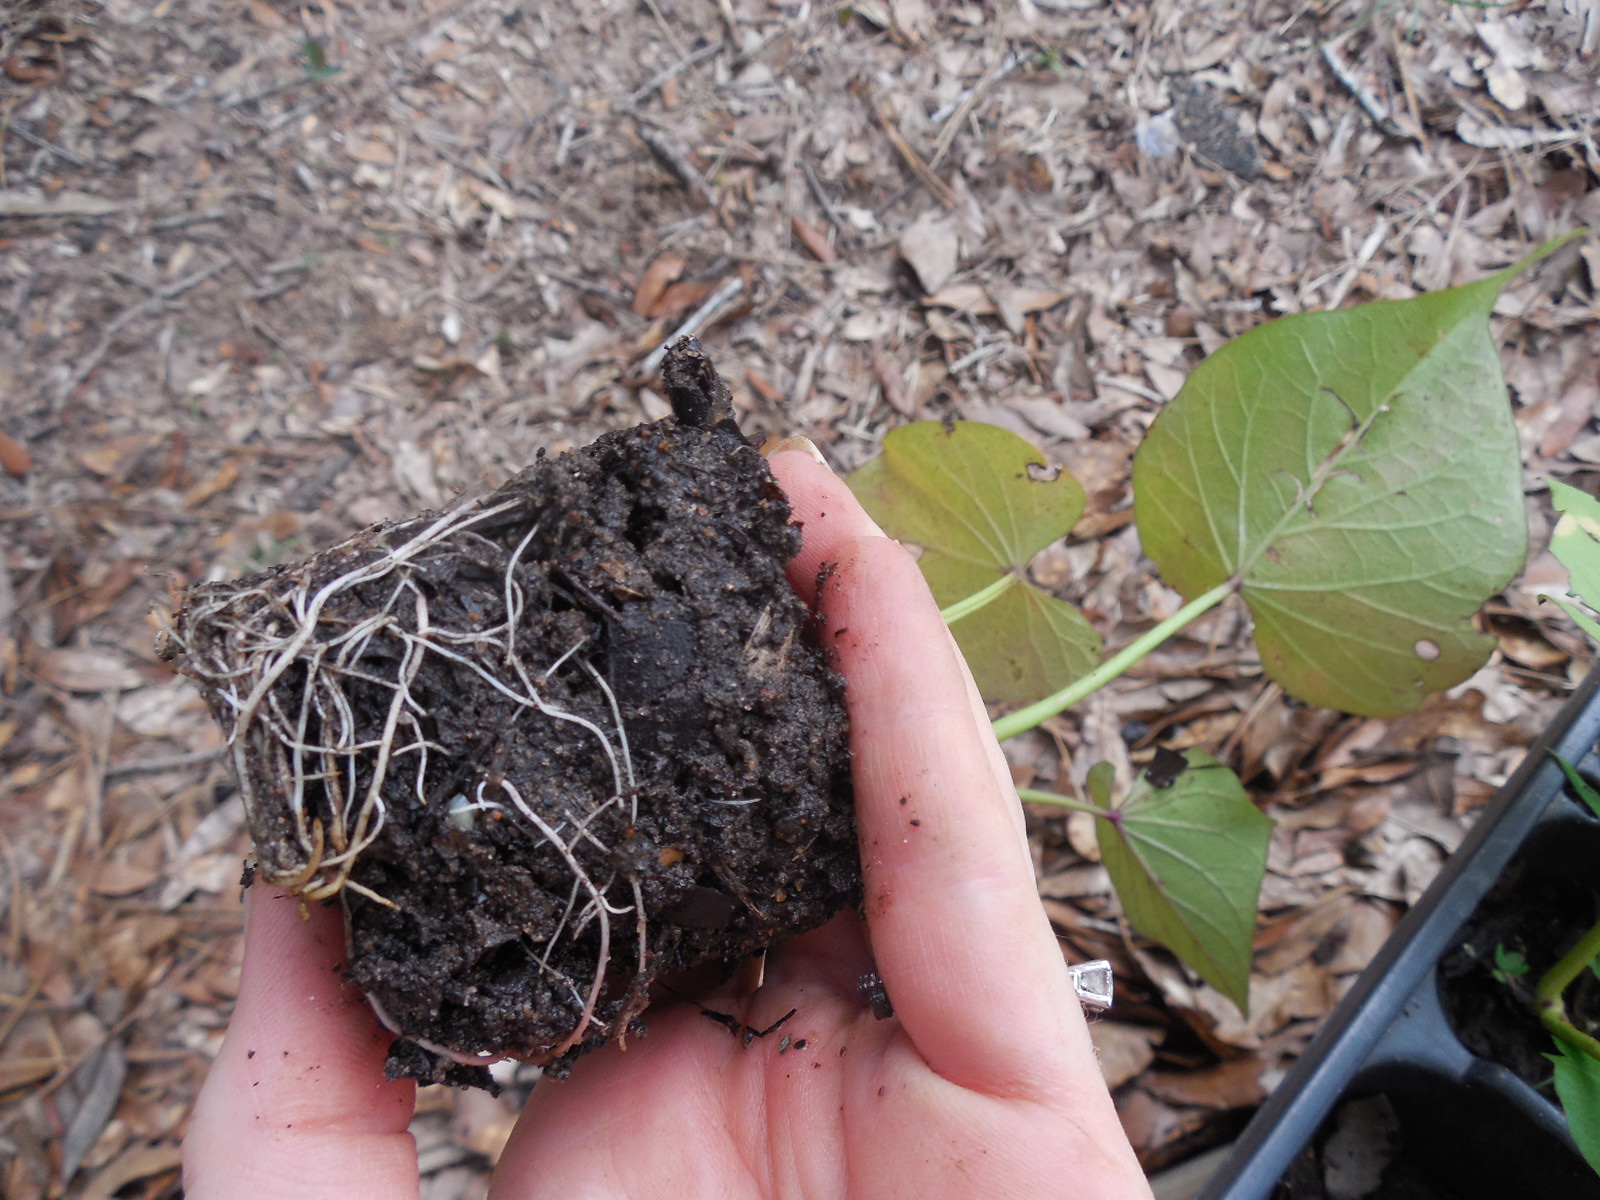
Within a week, roots will begin developing and soon you will be able to see them poking out from the bottom of the flat. The sweet potato slips are ready to be planted in your garden and soon the vines will be everywhere!

Just let them grow for at least 120 days, then start digging!

Have you ever rooted your own sweet potato slips? What method did you use?

Amazing Refrigerator Dill Pickles-No Canning Necessary!

Standard

My husband has been asking me about these refrigerator dill pickles almost since the first cucumbers started appearing. He still remembers the ones that I made last year. I loved them too and this year I grew dill specifically for them.

This recipe is adapted from the recipe on Taste of Home’s website. I have tweaked it and scaled it down for those of us who may not harvest huge amounts of cucumbers. Thanks to my easy DIY cucumber trellis, I have harvested quite a few already. If you have just a few cucumbers but would still like to try making some pickles,  I have also included a recipe for making a single pint jar of pickles that only requires 3-4 pickling cucumbers.

If you have only eaten commercial canned pickles, you should at least try to make a single jar.

Also, you don’t have to have canning jars to make these pickles. You can save glass jars from jam. spaghetti sauce, salsa, etc. Can you tell that I really want you to try these?

Let’s get started! Let me show you how simple it is to make your own pickles.

DSCN4745

For 6 pint jars of pickles you will need: 20-24 pickling cucumbers that are about 4″ long, 2 cups white vinegar, 2 cups water, 1/2 onion, handful of dill (approx. 30 sprigs), 3 cloves of  garlic, 1/8 cup canning salt, and 1/3 cup sugar.

For 1 pint jar of pickles you will need: 3-4 pickling cucumbers that are about 4″ long, 1/2 cup white vinegar, 1/2 cup water, one slice of onion, 3-5 sprigs of fresh dill, 1/2 clove of garlic, 1 tablespoon canning salt, and 1 tablespoon sugar.

DSCN4747

Slice the cucumbers into spears, rounds, or halves,  and thinly slice the onion and garlic. Rinse the dill.

If your cucumbers are slightly overripe (like mine were after I left my garden for 6 days), then I recommend that you slice them into rounds for sandwich pickles. My first batch of pickles were sandwich pickles, then I was able to make some spears.

Put the water, vinegar, salt, and sugar into a pot over high heat.

DSCN4749

Divide the onion, garlic, and dill among the 6 pint jars. Cram the cucumber slices into the jars as tightly as you can.

When the water-vinegar solution comes to a boil, pour the solution into the jars.

Let cool for a few moments, then put the lids on and refrigerate.

Pretty easy so far, right? Slice vegetables, boil solution, pack jars, pour solution, put on lids, refrigerate.

Now here is the tricky part.

You have to wait 24 hours until you open them.

DSCN4799

After you open them, and take your first bite, you will never think of pickles the same way again. Look at how fresh they are!

They are delicious eaten right out of the jar as the cold air from the refrigerator blows over you.Yes, they’re that good.

They are also a fabulous accompaniment to a sandwich. We recently had my Easy Chicken Salad with Dill for dinner, and I put a few pickles and fresh garden tomatoes on the sandwiches. Yummy!

Try this recipe and let me know what you think!

Don’t forget to pin it or post it to your timeline on Facebook so you can find it again.

Feel free to share this recipe on Facebook! While you’re on Facebook, please give my Coffee to Compost page a like if you haven’t done so already! Thanks and happy gardening!

Akers of Strawberries

Standard

I finally went to Akers of Strawberries in Baker, Florida, to get some strawberries for jam and smoothies. Strawberry season was just about over when I picked, but I was still able to find some berries for a good price.

DSCN4681

Look at all those strawberry plants! That’s not even all of one side!

DSCN4683

The berries were small, but they were destined to be smushed into jam or frozen for smoothies anyway.


DSCN4690

My mom gave me this hat. I used to try to be tan, but it is really hard to fight genetics. I think I’m done with that exercise in futility.

Plus, I hate being sunburned.

DSCN4707

Strawberry jam-here we come! If you are near Baker, Florida, be sure to visit Akers of Strawberries during March or April for their peak strawberry picking time. You can like them on Facebook to be updated on what they have available.

My favorite deal right now is the 20 pounds of peaches for $25! That’s a great price for fruit!

DSCN4675

Strawberry season may be over now, but the fresh vegetables and peaches are plentiful.

Adventures in jamming are beginning! Be sure to check out my post on how to make Easy Two Ingredient Strawberry Jam- No Canning Required!

What fruit do you look forward to each year?


Fresh Tomato Cucumber Feta Salad with Basil

Standard

What do you look forward to the most from your garden?

I look forward to the first tomatoes and cucumbers so I can toss together this salad.

It is simple, but so flavorful.

Image

The ingredients are few and fresh: 1 sliced pickling cucumber, 4-6 halved cherry tomatoes, 1 tablespoon finely diced feta cheese, 1-2  basil leaves, a drizzle of Italian dressing or balsamic vinaigrette

Optional: nasturtium bloom (or other edible flower) and basil leaves for garnish

Toss the cucumber, tomato, and feta. Use scissors to snip the basil into ribbons, then sprinkle the basil over the feta. Drizzle with the dressing and garnish with the edible flower and basil. Easy, fresh, and nutritious.

Enjoy the intense flavors of summer!

Those little pickling cucumbers are so delicious. They are loving the DIY cucumber trellis that I made for them. The bees are working my garden well so my cucumbers that used to look funny now are normal in appearance.

The refrigerator pickles that I plan to make taste fabulous! Look for a recipe soon.

Did you see how many I picked after I left my garden for 6 days? Check it out in this post!

Do you have a friend who may like this recipe? Feel free to share on Facebook!


Bernheim Arboretum and Research Forest-Edible Garden!

Standard

Although I did leave my garden for 6 days, I was able to visit another edible garden growing in the beautiful Bernheim Arboretum and Research Forest. It was beautiful. The deliberate planning and the creative ideas made for an inspiring visit.

DSCN4640

There were a series of unique planters that caught my eye.

DSCN4645

They were made of straw by their artist in residence, Mei Ling Hom. They were arranged in a RhizoLink. This line of planters was arranged to represent the dits and dashes of Morse code. For more images, click here and here.

Maybe I’ll try to make my own someday. 🙂

DSCN4642

Here is their greenhouse, with the RhizoLink along the path. Don’t the planters add a nice bit of structural interest?

I love their greenhouse. If I had one that big, I wouldn’t need a regular house.

10438781_435789333229596_1863554003_n

I could just put a little cot in the center aisle for sleeping at night.

DSCN4646 DSCN4651

The raised beds are at varying heights to accommodate children, the elderly, and those in wheelchairs. Raised beds also provide more control over the growing medium. Some of the beds were made of wood, others of rock. The plants looked quite healthy and I loved looking at all the varieties.

DSCN4653

I’m sure this Faerie Garden is a favorite of the children and young at heart. I think it is a wonderful way to get children interested in growing.

10439760_435789253229604_253275130_n

This compost bin is similar to my compost bins, but is made of logs rather than pallets. The thermometer helps them monitor the temperature.

10438822_435789336562929_1862760638_n

I thought that this was a neat way to provide shade, privacy, and color to a front entrance. You could plant a flowering vine(or pole beans!) to climb the string, and some sweet potato vines to spill over the sides. So much inspiration here.

DSCN4654This little garden sign seems to sum up the purpose and goals of Bernheim’s Edible Garden.

10443724_436891416452721_1845539401_n

If you ever visit Kentucky, a stop at the Bernheim Arboretum and Research Forest will be well worth your time. You can also visit their garden timeline. I hope that you were inspired!

Do you want to be updated when I post something new? Like my page on Facebook!

I Left My Garden for 6 Days

Standard


Yes, I was that crazy lady with a tactical flashlight looking for cherry tomatoes last night when I returned.

I’ve had crazier ideas-remember the seeds in the oven?

DSCN4662

Not pictured: a handful of cherry tomatoes picked by flashlight

I was so excited to go on a treasure hunt this morning and find the rest of the vegetables!

So what do I plan to do with this bounty?

The yellow squash are destined for being sauteed with some onions in olive oil and of course a bit of butter. 🙂 I think I will just blanch and freeze the green beans for now.

DSCN4660

Most of the cucumbers are overripe and yellowing, but should make decent pickles.

DSCN4659

I was pleasantly surprised to see these banana peppers. They were grown from seeds saved from a pepper purchased last year. What do you think of stuffing them with a cream cheese-dill mixture?

DSCN4663

white patty pan squash

The patty pan squash are so big that I think I am going to make some chocolate bread with them, following a suggestion given by tinywhitecottage in response to my UFO squash post.

There were some casualties too; my zinnia, tomatillo, and basil seedlings are roasted, and I may not get any ground cherry plants after all. Yes, the ground cherry plants were grown from free seeds, but they were valuable to me.

While I was in Kentucky, I visited a very nice edible garden. I’ll share pictures of that soon. They had  neat compost bins that are similar to my compost system, and some biodegradable planters that really were a neat feature. I think you will enjoy the pictures.

I hope your gardens are doing well!

Why Does my Cucumber Look Funny?

Standard

If your cucumber is shaped funny or looks lopsided, it is probably a pollination problem.

DSCN4578

‘National Pickling’ cucumber

This is my first ‘National Pickling’ cucumber of the season, and it was not completely pollinated. All the seeds are not developing, so it is not filling out into the perfect cylinder that we see at the grocery stores.

Hopefully the bees have found this plant by now, and the rest should look normal.

If problems still persist for you, or if you don’t have many bees in your area, you can follow the hand-pollination process found in my squash post.

The funny-looking cucumber is still edible though, and is destined for a salad. 🙂

Buy 2, Get 3 Free! How to Propagate your Tomato Plants

Standard

I love free plants! I recently got some free tomato plants for a friend.

I noticed that she had some ‘Sweet 100’ tomato plants that were sending off what some call “suckers”,  and a bare spot nearby.

You may already know how that I heartily dislike bare spots of ground, especially when it could be growing a tomato plant.

“You know, I could make you some more tomato plants to go in that spot,” I told her.

My friend was excited and let me snip away.

Here’s all you need: tomato cuttings, pots,  potting soil or compost

DSCN4340

tomato cuttings with lower leaves removed


First item of business: strip off leaves from the bottom 6-8 inches that will be under the dirt. Conventional recommendation is to remove all flowers and fruit so the cutting can concentrate its energy on making roots.

I left the flowers. We’ll see how that worked out for me.

DSCN4343


Second, stick the cuttings into the soil and place in a shady spot. I used the bottom of my pallet potting bench. It has filtered sunlight and it is easy for me to remember to water them.

So far, not to complicated, right?

Don’t worry, it stays uncomplicated. 🙂

DSCN4471

The third step is to water and wait. Keep the soil moist but not soggy until you begin to see little roots poke out of the bottom of the pot.

This may take between 10-14 days, depending on climate. At this point, you can carefully hold the plant between two fingers, flip it upside down and see how the roots are growing.

A new plant with root development like the one above will be able to do well on its own in a garden.

DSCN4473

Rooted tomato suckers

As you can see, the plant that had flowers managed to make roots and tomatoes at the same time. Verdict: leave the flowers, no big deal when it comes to tomatoes.

Treat the new plants like other transplants: keep watered, give shade for the first few days if they begin to look stressed, and watch them grow!

If you want to watch the progress, you can also root them in a jar of water. Technically you could just poke them in the garden where you want them, but you would need to give them much attention to be sure they get enough shade and water. Rooting them in pots means that they have access to nutrients(compost) as well as the special attention that they need.

My friend was happy to get more tomato plants for free. I hope that she has more tomatoes than she knows what to do with this summer!

Propagating tomatoes is similar to how you propagate many other herbs. I made another mint plant in a previous post using a similar technique, and shared some oregano with my brother using root division in another post.

I’m always excited to save money in the garden. What about you? Have you ever rooted a tomato cutting? Did you know that it could be done? I’d love to hear your thoughts and it is easy to comment!

DIY Cucumber Trellis on Privacy Fence

Standard

I have nice neighbors. Not everyone would agree to letting the crazy plant lady next door put a trellis on the privacy fence.

DSCN4517

I ended up using tacks, yarn, and scissors for this project. I also wanted to have a neat grid so I grabbed a tape measure as well. You can also do a helter-skelter version of this; I really don’t think that cucumber vines have a preference. 🙂

DSCN4520

All you do is push the tacks(small nails or staples will also work) into the fence in whatever shape you want. I chose a grid of rectangles. My rectangles were approximately 3’x1′. The trellis is about 7′ tall.

I really did contemplate using staples and nails, but I could hear music playing on the other side of the fence and I didn’t want to try my neighbor’s patience by banging a zillion times. I may go back, though, and strategically place some staples as insurance. 🙂

Then, twist the yarn or twine around the tacks(or nails).

DSCN4521

Maybe next year I will do some complicated geometric figure, but this year I am satisfied with a decent-looking grid with some slashes for the cucumber tendrils to grab.

DSCN4522

See? I think they like it.

If the new growth is any indication, the vines seem to really like their new trellis and the additional exposure to sunlight.

Technically, you don’t have to trellis your cucumbers, but a trellis can help keep the vegetables off the ground and lessen the damage due to bugs and moisture.

This project is an inexpensive way to trellis cucumbers. My garden plan changes from year to year, and this trellis can easily be removed if I decide to grow something else near the fence. If I do grow cucumbers here again, I will need to amend the soil with compost to replenish the nutrients.

My dill is growing nicely, and if I can restrain myself from putting it all in my Easy Chicken Salad recipe, I will have plenty for the homemade pickles on my June To-Do List.

Do you have any special cucumber recipes?

Easy DIY Cucumber Trellis

UPDATE: Look at it now! It has climbed to the top and is coming back down! The other day I picked 17 cucumbers off of the vines. They are loving being off the ground and all the warm sunshine. I have made pints and pints of my Amazing Refrigerator Dill Pickles.

Calling All Foodies…What Should I Do With My UFO Squash?

Standard

I want to honor this little alien spaceship by making something with it that not only tastes delicious, but also has a creative presentation inspired by its other-worldly shape.

I am looking for some ideas from you, my talented readers.

DSCN4593

I have a variety of fresh herbs on hand: basil, mint, oregano, rosemary, cilantro, thyme, and dill.

So what are your ideas? I can’t wait to be inspired! Ready, set, go!

Note: Technically this is called a patty-pan squash, but I can’t help but think of a little UFO when I see it. 🙂 Can’t you see it?

UPDATE: To see what I did with patty pan squash, check out this post! It’s chocolatey and savory!