My Gardening Hat and I Visit the Beach

Standard

Sometimes it’s nice to have a little variety.

DSCN5131

The repetitive sounds of the waves are very relaxing, and I really do have to fight the temptation to fall asleep on the beach.

Blister City awaits me if I fall asleep on the beach.

Here there are no seeds to plant, no weeds to pull, no crops to harvest.

At first I am antsy, then I relax.

It’s a shame to live so close to these beautiful beaches and not visit once in a while.

I visit, then head home, hoping that I did not get burnt, and eager to see garden green.

Do you prefer the beach or the garden?

Florida Raised Bed Garden and the Deadly Accessories

Standard

Remember the monster tomato plant? Well, it’s still growing.

DSCN5125

This ‘Mortgage Lifter’ is super tall. Production is low, but there is at least one tomato on it.

DSCN5115

That’s not all I found on it.

DSCN5124

That is a tobacco hornworm. It can absolutely decimate a tomato plant. At first I thought it was a tomato hornworm, but my research assistant, Mr. Wikipedia, informed me that the tobacco hornworm has 7 stripes, whereas the tomato hornworm has 8 stripes.

Go ahead, count the stripes. 🙂

Those white pearly studs are its deadly accessories, the pupae of a parasitic wasp that will kill the caterpillar. Mr. Wikipedia went on to tell me some pretty gruesome facts about the wasp’s life cycle in the caterpillar. Apparently a virus is injected with the wasp eggs and 2 molts actually occur inside of the caterpillar before the wasp larvae spin the cocoons on the outside…it actually makes you feel a little sorry for the destructive garden pest.

So if you see a tobacco hornworm flaunting some bling, let it be- Nature’s Pest Control is on the job.

DSCN5114

Let’s end on a happy note, shall we?

Many cherry tomatoes are being harvested and enjoyed. The green bean plants have produced much for them but are ready to be converted into wonderful homemade compost!

It’s almost time to start the fall garden!

Here in North Florida, we can plant many spring crops again, as well as start many of our fall crops. If you are in Florida, be sure to consult the Florida Vegetable Gardening Guide provided by the University of Florida.

Have you been thinking about what you want to plant in August and September?


How to Save Your Lettuce, Radish, and Broccoli Seeds Like a Ninja

Standard

Fresh lettuce has so much flavor! I grew some Bibb Buttercrunch lettuce from some free seeds. I really liked the taste and I want to grow it again, so I let it bolt, or go to seed.

The problem with lettuce seeds is that they are small and often stick to remnants of the flower and fluff.

DSCN4573 DSCN4582

One way to save the seeds is to wait and let the stalks dry out, then crinkle the seed heads in your hands to release the seeds.

I didn’t want to wait.

I had a crazy idea.

What if I stuck the seed heads in my Ninja (food processor) for a bit??

So I tried it.

DSCN4614

It separated the chaff from the seeds quite well! I gently blew the chaff off the top and ta da! I was a little afraid that I would end up with lettuce seed puree but I didn’t. 🙂

DSCN4615 - Copy

Look at that-enough lettuce seeds to grow salad for all my neighbors. And their rabbits.

My brain kept thinking.

If this could be done with lettuce seeds, I wondered, what about those tough seedpods from my daikon radishes and broccoli?

daikon radish seed pods

daikon radish seed pods

It worked quite well for the daikon radishes. Just a second or two of the food processor and the seed pods had released the seeds.

saving broccoli seeds

Separating broccoli seeds was a snap.

DSCN4606

I’m so excited about free seeds! I have an entire post on how I get free seeds, and saving seeds from your own garden is one of the ways to get them. I also have a post with more money-saving garden tips.

So what do you think of this method of saving lettuce seeds? Or do you think that this method is crazy?  Do you know of anyone else who saves seeds this way? If so, I’d love to hear about it!

Propagating Torenia (Wishbone Flower) from Cuttings – More Free Plants!

Standard
DSCN4420

Torenia

Florida summers can be so hard on flowering plants. By mid-July, my tomato and cucumber plants are declining rapidly, succumbing to old age and oppressive humidity. Torenia continues to bloom heartily, even in North Florida’s hot and humid summers. It is easy to propagate too.

I am going to use the same technique that I have used on mint, basil, and tomato cuttings: rooting in water.

DSCN4421        DSCN4424

Cleanly remove some cuttings, them remove the leaves that will be below the water or soil line. Leaves submerged in the water will decompose. Yuck.

Torenia rooted in water

Soon you will see white roots begin to grow. Most likely the roots will first appear at the nodes, or places where the leaves or branches grew from the main stalk.
DSCN4555     DSCN4557

Once they have a good start on a root system, they can be planted in a pot of homemade compost or potting soil. There you are-new plant for free!

Baby the new plant for a few days, then you can put it in your garden.

For more tutorials on how to get free plants, you can read my Buy 2, Get 3 Free Tomato Plants post, or Have a Mint? Make Another Mint! You can also read about plant division in my post about sharing oregano with my brother.

Of course, a favorite money-saving post is How I Get Free Seeds.

Gardening is as expensive or as inexpensive as you make it.

What about you? Have you ever divided or rooted a plant before? Be careful, it can be addictive!

Be watching for an update on the monster tomato plant from the Florida raised bed garden and for pictures of some deadly pearly studs. Yes, some accessories can kill you! Any guesses about what the deadly pearly studs can be? Some of you may have seen them in your garden. Do you need another hint or can some of you gardeners already guess what they are?

UFO Squash Update

Standard

No, it didn’t take me to Mars, but do you remember my UFO squash post?

You as my readers had some great suggestions for what to do with my patty pan squash. Of course, I had to try it sauteed first; that was pretty good.

What’s better than that? Chocolate cake.

One of the commenters, tinywhitecottage, suggested making quick bread with it. Of course! Makes sense to me; why not treat it like zucchini and make bread with it?

Then I remembered seeing a recipe on myfavouritepastime. She has a delicious recipe for Chocolate Zucchini Apple Bread. As you can see, I was quite generous with the chocolate chips. 🙂

DSCN4851

I thought it was great! It really tasted like chocolate cake. If I hadn’t told people that there was squash in it, they would have never known. To some, it was a plus having a hidden vegetable in the chocolate loaf. Others were a bit squeamish. After their 3rd slice I figured they were over it. 🙂

DSCN4944

I liked smearing a bit of cream cheese on mine. I recommend that you check out her site-she has so many great recipes and ideas!

Now on to the savory. One of the commenters gave a detailed kebab recipe which included the patty pan squash, red onions, various spices, and slivers of fresh mint. I had a few of the baby squash in the produce drawer, waiting to become kebabs. Well, I was a bit pinched for time tonight so I thought, “Why not just whip up a quick saute using that recipe as inspiration?”

DSCN5101

That’s what I did. It really took a rather ordinary, somewhat bland squash and elevated its status. I have to admit to being a bit uncertain about the mint addition, but it was really good! My husband liked it too. 🙂 If you want the recipe, check out the comments on the UFO squash post.

If you grew the squash just because you thought they were cute and figured you would decide what to do with them later (like me), Chocolate Zucchini Apple Bread and Savory Kebabs are a great place to start!

My plants are still hanging on, in spite of the squash vine borers and the intense heat and humidity. I hope to try stuffing them next!

Have you ever grown something just for its looks and hoped it would taste good too?


Blueberry Peach Quick Jam (No Canning Required!)

Standard

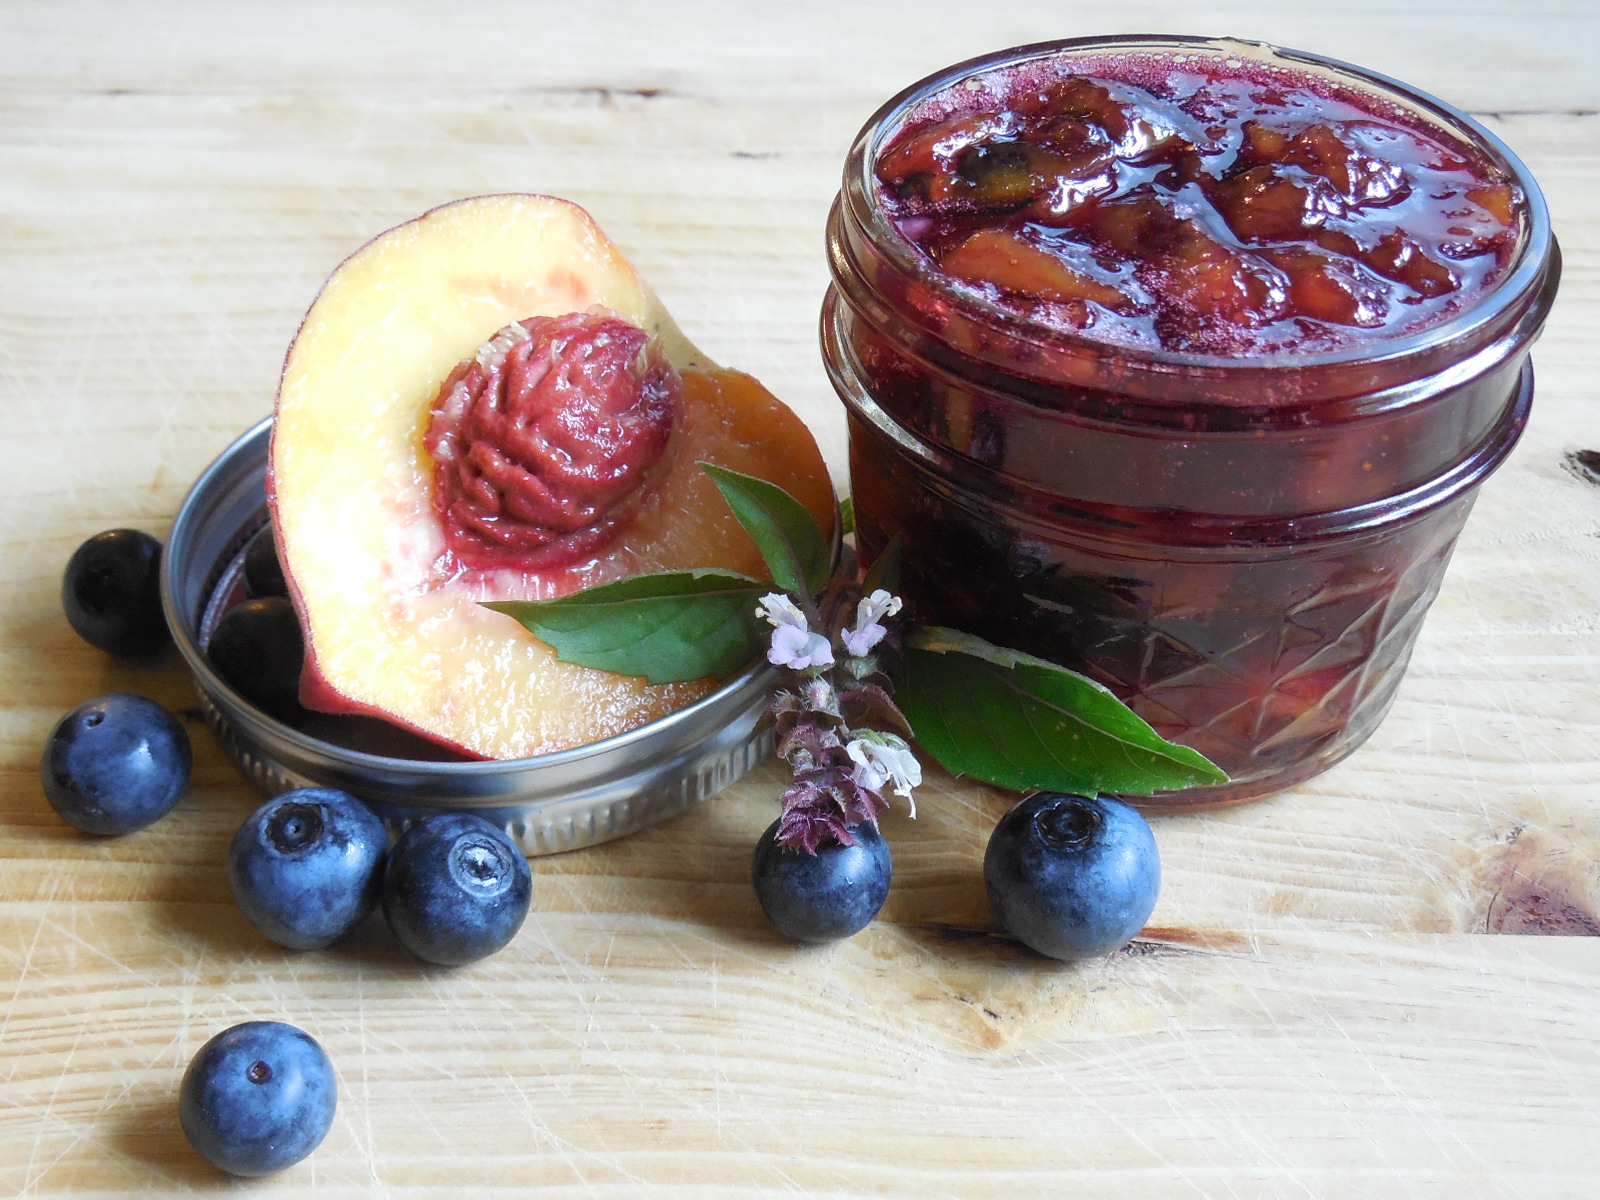
I have been jamming like a crazy woman. Making fresh jam is so simple and a fast way to capture the intense flavors of summer. Blueberries and peaches combine wonderfully-they are  better together.

This is just the recipe for a single half pint jar, a great way to get your feet wet on the shores of Jamming. You may use the full batch recipe to make more jars, just keep in mind that smaller batches (say 6-8 jars) are easier to  work with and will help the jam set.

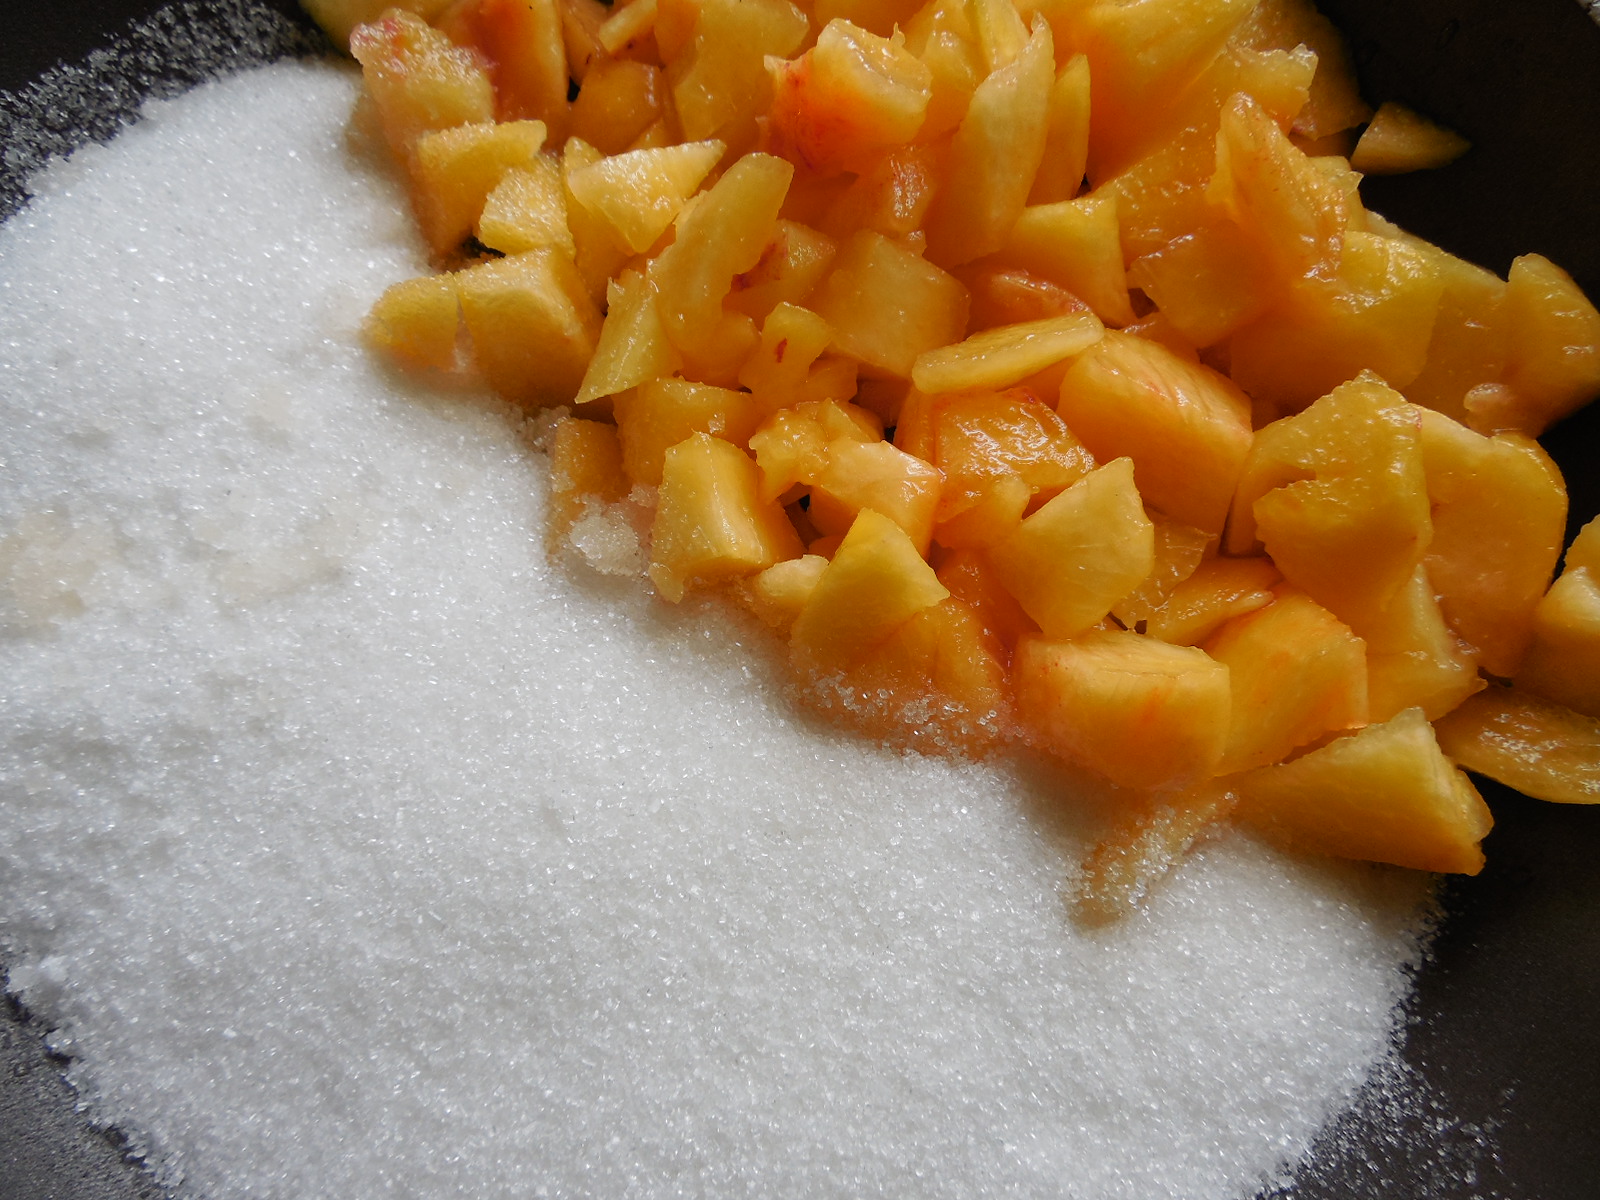
You will need: 1 cup finely chopped peeled peaches, 1/3 cup blueberries, and 1/2 cup sugar

Full batch: 6 cups finely chopped peeled peaches, 2 cups blueberries, 3 cups sugar ( makes about 6 half pint jars)

I found that I did not need pectin to make the jam set. You may increase the sugar if you like, but I like my jam a smidgen on the tart side and less sugary. I feel that this helps me to really capture genuine fruit taste in a jar.

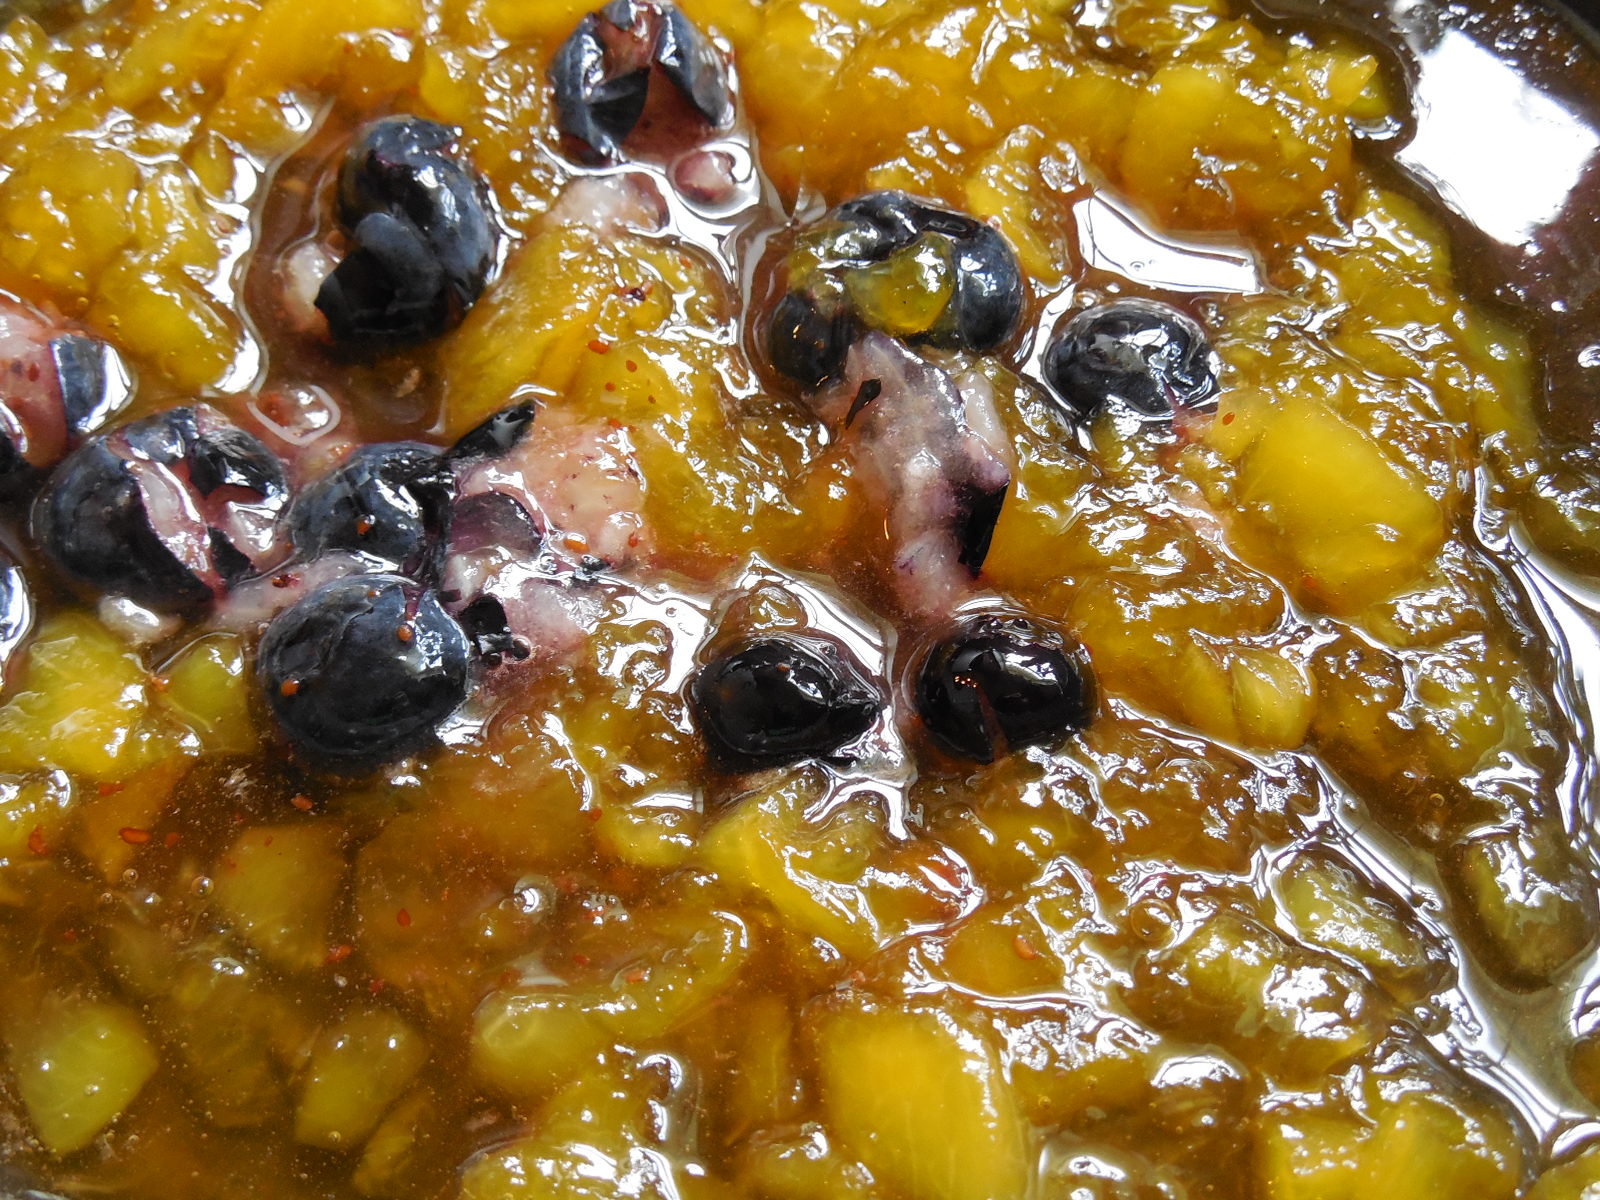
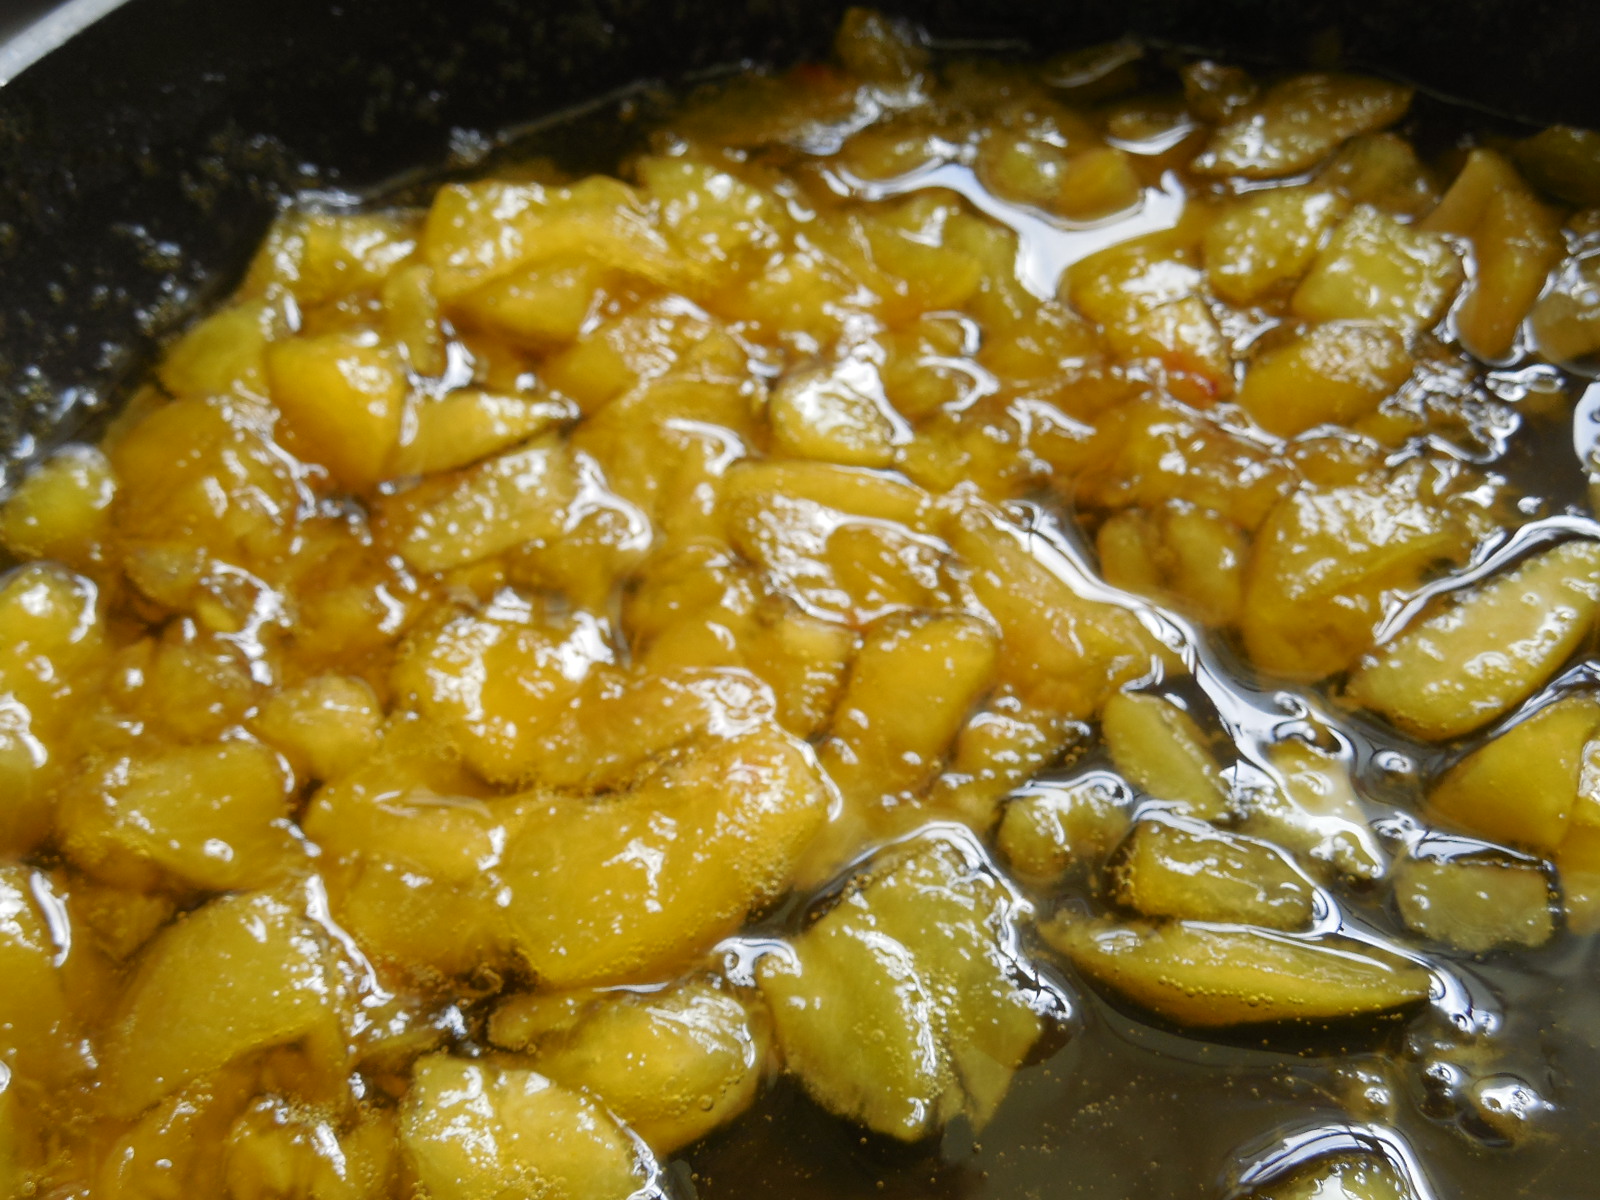
Start with the peaches and sugar. Cook them over medium-high heat, stirring often, until the jam begins to thicken. Add the blueberries and mash them gently. Continue cooking until it has set according to the he cold plate test described in my Easy Two Ingredient Strawberry Jam Recipe.

DSCN4951 - Copy

See how the peaches have darkened a bit? You can taste the jam at this point to be sure that it is sweet enough for you. If you want to can it, process in a hot water bath for 10 minutes.

Canning is optional, though. Please don’t skip this recipe just because you may be intimidated by canning!  Can you imagine the wonderful feeling of opening a jar of summery jam in the middle of winter, when memories of  local strawberries, peaches,and blueberries  have faded, like summer’s tan lines? Canning really is quite simple, maybe I”ll write a tutorial one day.

You can store this in a pretty glass jar or just in a covered container in the refrigerator.

Blueberry Peach Quick Jam ( No Canning Required!)

Blueberry Peach Quick Jam ( No Canning Required!)

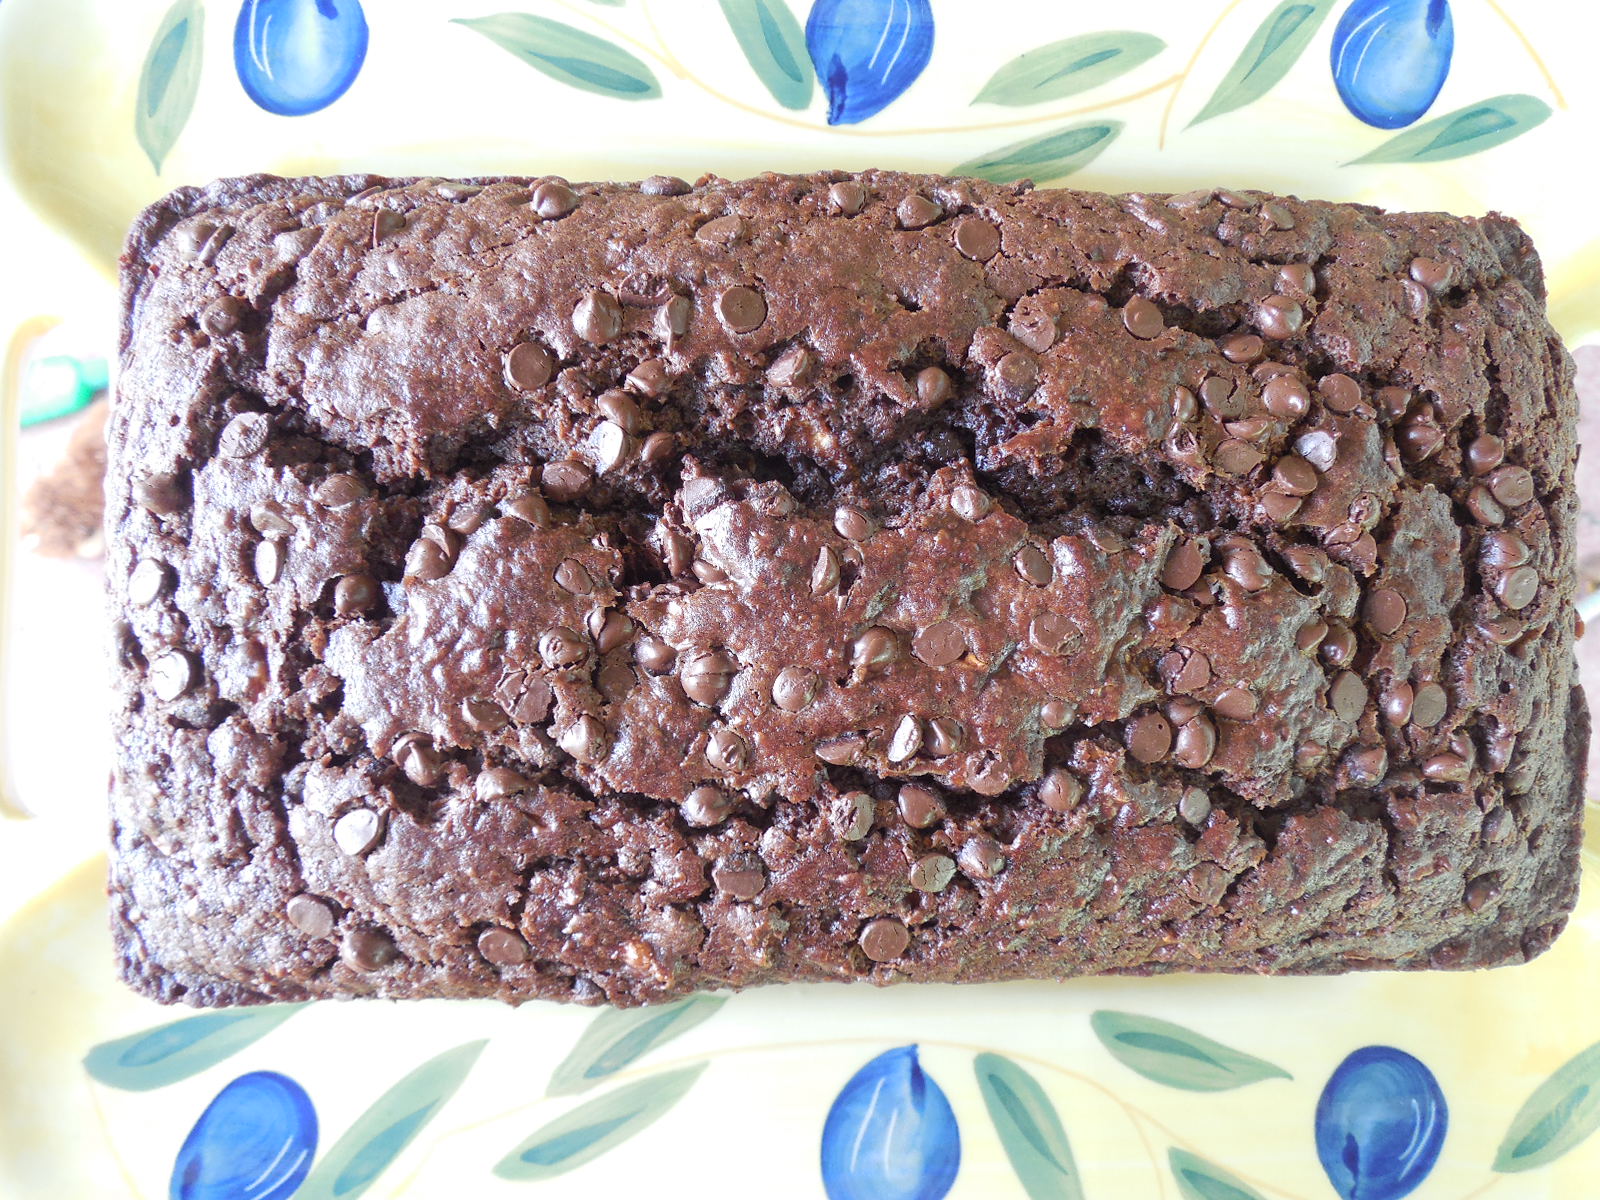
Isn’t that purple color so luscious? Time for some homemade bread!

Homemade bread is the only bread worthy of fresh jam. To put it on anything less keeps it from its full potential. Fellow jam makers, don’t  you agree?

Have you made fresh jam yet? I have several easy recipes for you: Easy Two Ingredient Strawberry, Blueberry, and Peach.

You are welcome to share these recipes and this site on Facebook. I’d love for you to come visit me on Pinterest and pin some Garden Tips and Recipes too!

Bacon-Wrapped BBQ Drumsticks with Cheddar

Standard

So what happens when you add bacon to BBQ? Happiness on a drumstick.

This is an easy and impressive way to make chicken.

Ingredients:                                                                                                                                                                                                                                         6 chicken drumsticks, 6 slices of bacon, 3/4 cup BBQ sauce (my friend Teresa on acupofdiy.com has a homemade BBQ recipe on her blog), and 6 slices of Cheddar cheese

Warning: Don’t use your nice baking pans for this recipe.

DSCN4985 - Copy


Heat the oven to 375 degrees. Wrap each drumstick in bacon and bake for 20-25 minutes or until chicken is cooked through and bacon is crispy.

DSCN4987 - Copy

Brush drumsticks with BBQ sauce (this is why you don’t use your nice pan) and lay the cheese on top.

Bake an additional 5 minutes more or until the cheese is gooey and melty.

DSCN4992

Bacon-Wrapped BBQ Drumsticks with Cheddar

Summer on a plate! Serve with some No-Slime Okra and some sweet tea, mint-infused if you want to be fancy.

Probably won’t be much conversation for a while after you bring these out-people will be too busy eating to talk.

So many fresh and delicious meals to be enjoyed in the summer. I am enjoying the fresh fruit so much. I’ll have to tell you about my Peach-Blueberry Jam next!

What is your favorite summer food?

How to Make No-Slime Okra

Standard
How to Make No-Slime Okra

I don’t like slimy food, but I still grew okra for the first time last summer.

DSCN4960 - Copy

Okra is one of the crops that grows well in Florida summers, so I decided to grow some anyway. My theory was this: any vegetable tastes good sauteed in olive oil with a bit of garlic, right?

I couldn’t believe how good it was! This way of preparing okra is so simple that I almost don’t even consider it a recipe.

To make 2 side servings of healthy, yummy okra you will need: 16 okra pods sliced 1/2 inch thick, 2 tablespoons olive oil, and 1 clove minced garlic.

DSCN4964

Saute the garlic in the olive oil over medium-high heat just until the garlic starts to look translucent. This will take just a few seconds-have the okra ready! Be sure the pan is really hot, then add the okra.

DSCN4962 - Copy

The heat will sear the slime right up and begin to cook the okra. Turn the slices so that both sides are lightly browned.

DSCN4968 - Copy

I love how that the okra slices look like little flowers. So pretty!

Sprinkle with kosher salt and enjoy!

This recipe may win over even the staunchest okra hater. I had to plant more row of okra last month- we are eating it so quickly! Once I get more coming in, I plan to try whole pods roasted in the oven. I also want to try some Cajun seasoning on it for a bit of spice.

If you think you hate okra, why don’t you give it another chance? You may just find another vegetable to love.

Okra is a crop that you can plant in North Florida’s hot July. For a list of more things to do in the garden, check out my July To-Do List.

Hmm…what would be good with this? Maybe some Bacon-Wrapped BBQ Chicken Drumsticks with Cheddar? Yummy post coming soon!

Small Batch Fresh Peach Jam Recipe- No Canning Required! (Full Batch Instructions Included)

Standard

I think I could eat warm homemade bread slathered with this peach jam for breakfast every day for a week and still love it. Fresh peach jam bursts with intense flavor. Peaches are in season now in North Florida, and by using just a little sugar as I do in this recipe, you can really let the peaches be the star.

DSCN4945 - Copy

The ingredient list is simple: 1 1/3  cup of  peeled finely chopped peaches(about 5 medium), 1/2 cup sugar. This recipe will make one half pint (one cup) of jam.

NOTE: I just got 75 lbs of peaches, and will be making full batches with 8 cups of chopped peaches and 4 cups of sugar. Yield is approximately 6 half pints. If you want to can them, process in boiling water for 10 minutes. Don’t try to double a full batch, as trying to make too much jam at once or it may not set properly.

Cook the peaches and sugar over medium-high heat, stirring often.

DSCN4946 - Copy  DSCN4947 - Copy

Cook until the jam has jelled, using the cold plate test explained in my Easy Two Ingredient Strawberry Jam Recipe post. This will take 10-15 minutes. Stir occasionally.

You can see in the second picture how that it has become darker in color and how that the syrup looks thicker.

Time to put the yumminess into a jar!

Small Batch Fresh Peach Jam Recipe

Small Batch Fresh Peach Jam Recipe

Let it cool slightly, then cover and refrigerate. I just love looking at the pretty colors in this picture.

Making jam is so easy to do, and with so much fresh fruit in season, why don’t you try to make a small batch of jam? You may just impress yourself. 🙂

If you can make mac-n-cheese from a box, you can make this jam. You will love how easy it is and your family will love to eat it!

If you’re somehow one of those people that doesn’t like peaches, you can try my easy strawberry jam recipe or my quick blueberry jam. One of my favorites is my small batch blueberry peach jam. Those recipes are great for a beginner and are very good.

Be sure to check out my no-slime okra recipe!

How to Propagate Rosemary from Cuttings

Standard

Rosemary-roasted chicken is a wonderful way to start an evening. You can start more rosemary plants from cuttings with a little patience. You can even start your own plant from cuttings purchased from the fresh herb section of a grocery store.You don’t need rooting hormone, just some rosemary cuttings and a pot of compost or potting soil. I mixed a little sand in with the compost for drainage.

DSCN4351


Younger cuttings are best. Strip off all leaves from the bottom 3 inches.


DSCN4352

Poke the cuttings into the prepared compost or potting soil.

DSCN4353

Place the cuttings in a shady spot and be sure that the soil is kept moist. It may look a bit sad for a few days, but be patient.

In about 2 weeks, you will start to see new growth.

DSCN5001[1]

Tip the plant out gently to check for root growth. If you see roots, it is a good time to let it get more sunlight.

DSCN5000[1]

How to Propagate Rosemary from Cuttings

You now have a rosemary plant! I hope some roasted rosemary chicken is in your future!

Propagating your plants is a great way to save money in your garden. I have gotten free tomato plants using this method. For more money-saving gardening tips, check out this post.

What do you like to do with rosemary?