Category Archives: Garden Tips

Florida Raised Bed Gardening (Part 1)

Standard

Thinking about starting a garden this year? Gardening in Florida is such a worthwhile endeavor. You can get fresh air, gentle exercise, and fresh vegetables!

I have been helping a retired couple set up a raised bed in their backyard. A raised bed is a great way to start gardening.

Many like the raised bed system of gardening because they have more control over the soil. In Florida, that is important because our natural ground is so sandy.

Also, many who have raised beds use the square foot method of gardening, as developed by Mel Bartholomew (see his blog here).

The first step is to select a site. You need between 4-6 hours of sun, really 6 hours or more is best. If some afternoon shade is available, your plants will appreciate the break from our blistering Florida sun.

They selected a site in their backyard that seemed to get the most sun.

DSCN3979

The next step is to assemble the raised bed. Be sure to use quality wood, but be careful of using wood that has been treated with chemicals-remember, your food will be growing in this box!

DSCN3980

This one was made by cutting a 4×4 into 4 equal lengths for the corners, then screwing 4x1x6 boards to the corner posts.

This  raised bed framework was built years ago and was used as a compost bin until they decided to use it for a garden.

DSCN3981

Next, lay a layer of  cardboard or thick newspaper to smother the grass. Poke a few holes for drainage, then add a thick layer of leaves. The leaves will also help to smother weeds and will provide more organic material as they decompose.

DSCN4105

Finally, add a thick layer of compost, at least 6 inches. This couple had been making compost using kitchen and yard scraps and had plenty of this rich material to use. For my tutorial on how to make compost, read this post.

DSCN4107

Florida Raised Bed Garden

Water the garden thoroughly to settle the soil and to be sure that it is level. Water will settle in any low spots.

The next post about raised bed gardening will cover how to plan and plant your Florida raised bed garden. This couple really wants tomatoes and herbs; see what they plant in Florida Raised Bed Gardening Part 2.


Who Wants Zucchini Bread?

Standard

It’s time to put on the trusty garden shoes and plant some squash in Florida! I am really trying to get many of my seeds in before Friday, as it is supposed to rain then. Plants always seem to grow better when God waters them.

DSCN3799

These are my favorite gardening shoes-an old pair of sneakers with the backs smashed in.

Planting squash in Florida is a bit different than other places. Typically, you are instructed to build little hills and to plant 3 seeds per hole.

Florida is so hot and often dry that I plant my zucchini, yellow squash, and patty pan squash at ground level or in a slight depression. If you plant them below ground level, it will allow the precious water to seep down to the roots rather than away from the plants.

DSCN4078


I amended my sandy Florida soil with some of my partially finished compost (see my post on how to make your own here) and a few tablespoons of 10-10-10 fertilizer. The worms are very active now in the compost; I am so happy to see the little workers in my garden.

DSCN4079


After mixing it together and incorporating some of the surrounding soil, I made sure that the seeds were placed far enough from each other that I wouldn’t be forced to thin them.

I hate pulling up potentially productive plants, so I try to space the seeds at recommended mature spacing when I am sowing. I typically just plant 2 seeds per hole. If both germinate, fine. If only one germinates, it will be left alone and will actually be happier than plants that are crowded 3 at a time.

DSCN4080

Pulled up the last of the rutabagas today. I have plans for the roots AND the leaves. I love crops like this- the whole plant is edible. They definitely justified their place in the fall Florida garden, but it was time for them to come up so I could plant some squash.

Planting squash in Florida is a great way to spend a spring morning!

Zucchini bread here I come!

DIY Garden Fence

Standard

I love my dog, Leif.

Leif loves to explore. In fact, his middle name is Ericson. Leif Ericson the dog loves to explore like his namesake, the Viking explorer. I don’t want my lovable dog exploring my gardens, so I needed a garden fence.

DSCN3974

See, isn’t he handsome? The expansion of the garden last year to include the sunny corner of our backyard prompted me to look into fencing options to keep him out of the gardens.

I needed a fence that was inexpensive, easy to install, and that would allow sunlight to reach plants on the other side. I also didn’t know if there would be an expansion, so I didn’t want anything permanent.  After much research and a few trips to Lowe’s, a friendly associate there suggested using bird netting. Inexpensive, and it would let sunlight through.

The posts on the next aisle were just what I needed to form the structure, and for less than $40, I had enough materials to fence my garden by the shed, the corner garden, and even my friend’s garden.

After my garden expansion this year,  my corner garden’s new dimensions are 50’x24′. Yikes! That’s 1,200 sq. feet!!! Time to expand the fence.

DSCN3943DSCN3942

Here’s the type of posts that I purchased. The netting is 7’x100′. This fence is about 3 feet tall, so I cut it in half to make it fit the posts.

My posts were 12.5 feet apart across the length, but you can have them closer or a bit farther apart if you prefer.

DSCN3944

I liked having the grid when I was cutting; I could just pick a row and follow it. Even those of us with difficulty cutting straight lines can do this :).

DSCN3945

Then I attached the netting to the hooks on the side. I suggest that you decide which way you want facing out and align the post and netting accordingly, pick a row in the netting to follow as you attach so your fence will hang straight, and start hooking the netting from the top.

DSCN3947

You will have some extra at the bottom. You can trim it off or leave it as extra protection from animals. If you have problems with small animals going under your fences, you could try laying this extra netting on the outside, pinning it to the ground with landscaping anchor pins, then covering it with soil. If you decide to trim it, leave a few inches so you can hook it under the bottom of the stake.

DSCN3946

I did not trim the netting and hooked the netting on the bottom. Then, I stuck the posts in the ground.

DSCN3966

Fairly simple, inexpensive, and keeps the dog out. To get in, I just lift up the stake in a corner, enter, and close it behind me.

If you have a very determined animal, you may want to try something more intense than the netting, but it works well for this dog. I like how I can easily change the garden without worrying about a substantial investment in fencing.

Wow, that’s a big garden. I’m excited to see what it looks like in a month-gardens change quickly in Florida!

Getting Seedlings Ready for Transplant

Standard

I think it is finally safe to plant out my precious tomato and flower seedlings. They have been nice and cozy in this little greenhouse at night, but now it is time to get them ready for the garden.

DSCN3958

See all that condensation? I have loved having a little greenhouse this winter; I have started so many different vegetables and flowers. It has helped me keep them a little warmer than the outside air, and in Florida, a few degrees warmer is usually about all you need. Plant seedlings that you may purchase have likely been coddled too, so they also should be “hardened off” before planting.

“Hardening off” seedlings is simply the process of gradually acclimatizing plants to the outside temperatures and light.

I am planning to plant just about everything in my garden expansion except for peppers and eggplants on Saturday, so I am beginning the process in earnest now.

DSCN3970
First, I’ll leave them under the porch, but will unzip the greenhouse so they are exposed to the changes in temperature.

Then, I will take them out in the sun during the day and keep them out of the greenhouse unless it threatens to get really cold. I have babied and pampered these seedlings(remember the oven story?), so I’d hate to lose them now.

DSCN3961

Hopefully, we have seen the last of the cold weather and many of my seedlings can go into the ground on Saturday. Soil temperature today was above 60 degrees, so my green beans should germinate. I may plant half of the green beans this weekend and half next weekend, just to be safe.

My final garden tasks today consisted of harvesting lettuce, kale, Swiss chard, and green onions for a salad and snipping a bit of parsley for homemade croutons. The flowers are from my daikon radishes(see my daikon recipe here; they have begun to flower and were a beautiful edible addition to our fresh salad.

DSCN3969

Is all this tilling, composting, mulching, and planting worth it? Absolutely.

How I Get Free Seeds

Standard

If you are just starting a garden, you may have many varieties on your wish list. Seeds are pretty inexpensive, but when you want to try many new varieties it can start to get pricey. However, there are ways to get seeds for free or for the cost of a few stamps.

DSCN3953

One way that I have gotten free seeds is through gardenhoard.com. Katie has a really neat site that sells many varieties of seeds. However, she also offers some older seeds for free. Sometimes others will donate seeds to her. I have gotten seeds from her for two years now and have had great germination results. All you need to provide is your wish list and a SASE (self-addressed stamped envelope). You can see the details on her site here. This year I’m really excited to try the ground cherry seeds. My ‘Black Krim’ and ‘Mortgage Lifter’ tomatoes have already sprouted.

I am grateful for the seeds that I have received from her and plan to donate some of my seeds to her this year.

DSCN3954

Another great site that is so helpful to new gardeners is gardenweb.com. Their Seed Exchange Forum is a place to trade seeds, but sometimes generous gardeners will offer extra seeds for SASE. Those offers go quickly, so if you see something that interests you, respond right away. There is also a Newbie Project that provides many types of seeds to new gardeners.

DSCN3950

I wanted to grow milkweed this year, and found an organization, Live Monarch, that is so concerned about the monarch butterfly’s food supply that they will send you free milkweed seeds. For a $1 donation, they will send you the equivalent of 2 packets of seeds. I donated to the organization and received my seeds and some information about the monarch butterfly. What you see in that picture is what I had left after I sowed some for this year.

DSCN3957

Another source of free seeds is gardening friends. If you get seeds or plants from someone in your area, it is probably well-adapted to your climate and should perform well for you also. I have received seeds and plants from other gardeners who were only too happy to give away extras. In my hand you see some okra seeds that I was given this year. I feel the same way about giving away seeds. I am so happy to be able to give away seeds or plants that another gardener is interested in having in their garden.

DSCN3955

Finally, your own garden can be a source of free seeds. If you learn how to save seeds from your flowers and vegetables, you can save yourself money on seeds next year (or have extra money to spend on new varieties 🙂 ). After all the seeds I saved last year, I may never have to buy marigold seeds again. Many of the tomatoes that I am growing this year are heirlooms, and so will grow true from their seeds. If your seeds came from a hybrid, you may or may not get the same result as the parent.

If you have a plant that has performed well for you, try to save its seeds. For example, I have been really impressed with my collards this year, so I may save their seeds to plant next fall.

Gardening can be as expensive as you want it to be. This is a way to try many seeds and save some money!

I have another post with more money-saving garden tips that can help you save even more.

Propagating cuttings from plants you already have or from cuttings given to you by friends can save you so much money and help  you get more of what you love. I have some tutorials on how to propagate Wishbone flower (great for Florida summers!), start sweet potato slips (the easy way-no toothpicks or stinky water), and how to divide oregano. My favorite plant to propagate though, is the tomato. I love to get more tomato plants for free! It is great to be able to give extra plants away to friends too.

Do you know of any other ways to get free seeds?

Coffee to Compost, Literally!

Standard

DSCN3899

I can never have enough compost in my Florida vegetable garden. Compost is ideal for amending sandy soil, assisting in water and nutrient retention, and providing vital nutrients to plants. Compost is available for purchase, but I endeavor to produce much of what I need myself. After my first year of composting, I was so impressed by what my yard and kitchen trash turned into that I realized that I should produce much more of this black gold for my garden.

There are many approaches and methods to making compost. Some are simple, others are complicated.

The simplest method is to just pile up yard debris, let the microbes break it down, and it should be ready in about a year. Composting happens naturally; it is the natural process that breaks down dead plant and animal matter and recycles it back to be ready for plant growth. This pile-it-and-leave-it method is simple, but it takes the longest time to complete.

On the other extreme, you could carefully measure out the proportions of green(grass clippings, kitchen scraps, etc.) and brown(dried leaves, straw, etc.) material, monitor the compost pile’s temperature, turn regularly, and have finished compost in a few short weeks. This is the most productive method, but also the most labor-intensive.

My three-bin composting system falls somewhere in the middle of these two.

DSCN3836

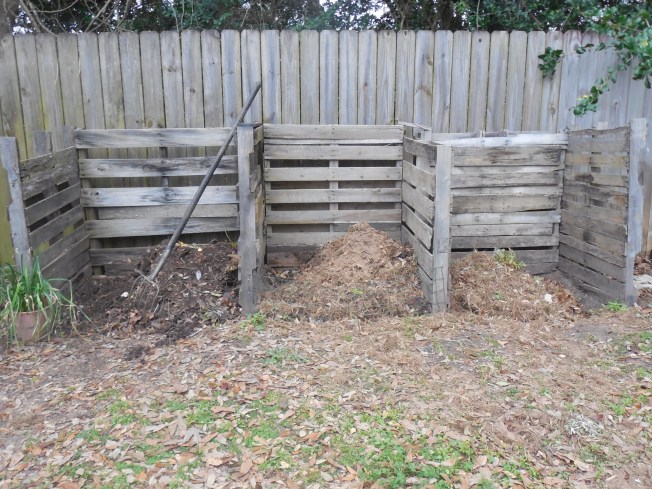
As you can see, my compost system is made of upcycled pallets. I add fruit and vegetable scraps from my kitchen, egg shells, coffee grounds (of course!), small weeds, plant trimmings, shredded paper, leaves, and grass clippings to my “new” pile. Starbucks gives away their coffee grounds to gardeners, so I try to grab a bag of them often. I usually turn the piles with a pitchfork once a week to circulate air and to speed up the process. During the summer, when I have access to grass clippings, I can have a large amount of finished compost within a month. During winter, I do not have as much plant material being added to the piles and so do not get compost as quickly.

Typically, one section is new materials, one is “cooking”, and the last section is finished compost.

DSCN3801

I avoid adding meat, bones, oils, invasive weeds(such as dollar weed), and plant matter that has been treated with an herbicide. The animal products, while technically compostable, may attract unpleasant animals. Invasive weeds may survive the composting process and be spread with the compost to my garden. Plants treated with an herbicide may retain traces of the chemical and harm my vegetables. Also, whenever I add melon rinds or fruit cores, I try to cover them so that animals aren’t attracted to the pile. Composting also occurs faster if the scraps are in smaller pieces, so I take a few extra seconds to cut banana, melon, and citrus peels into smaller chunks.

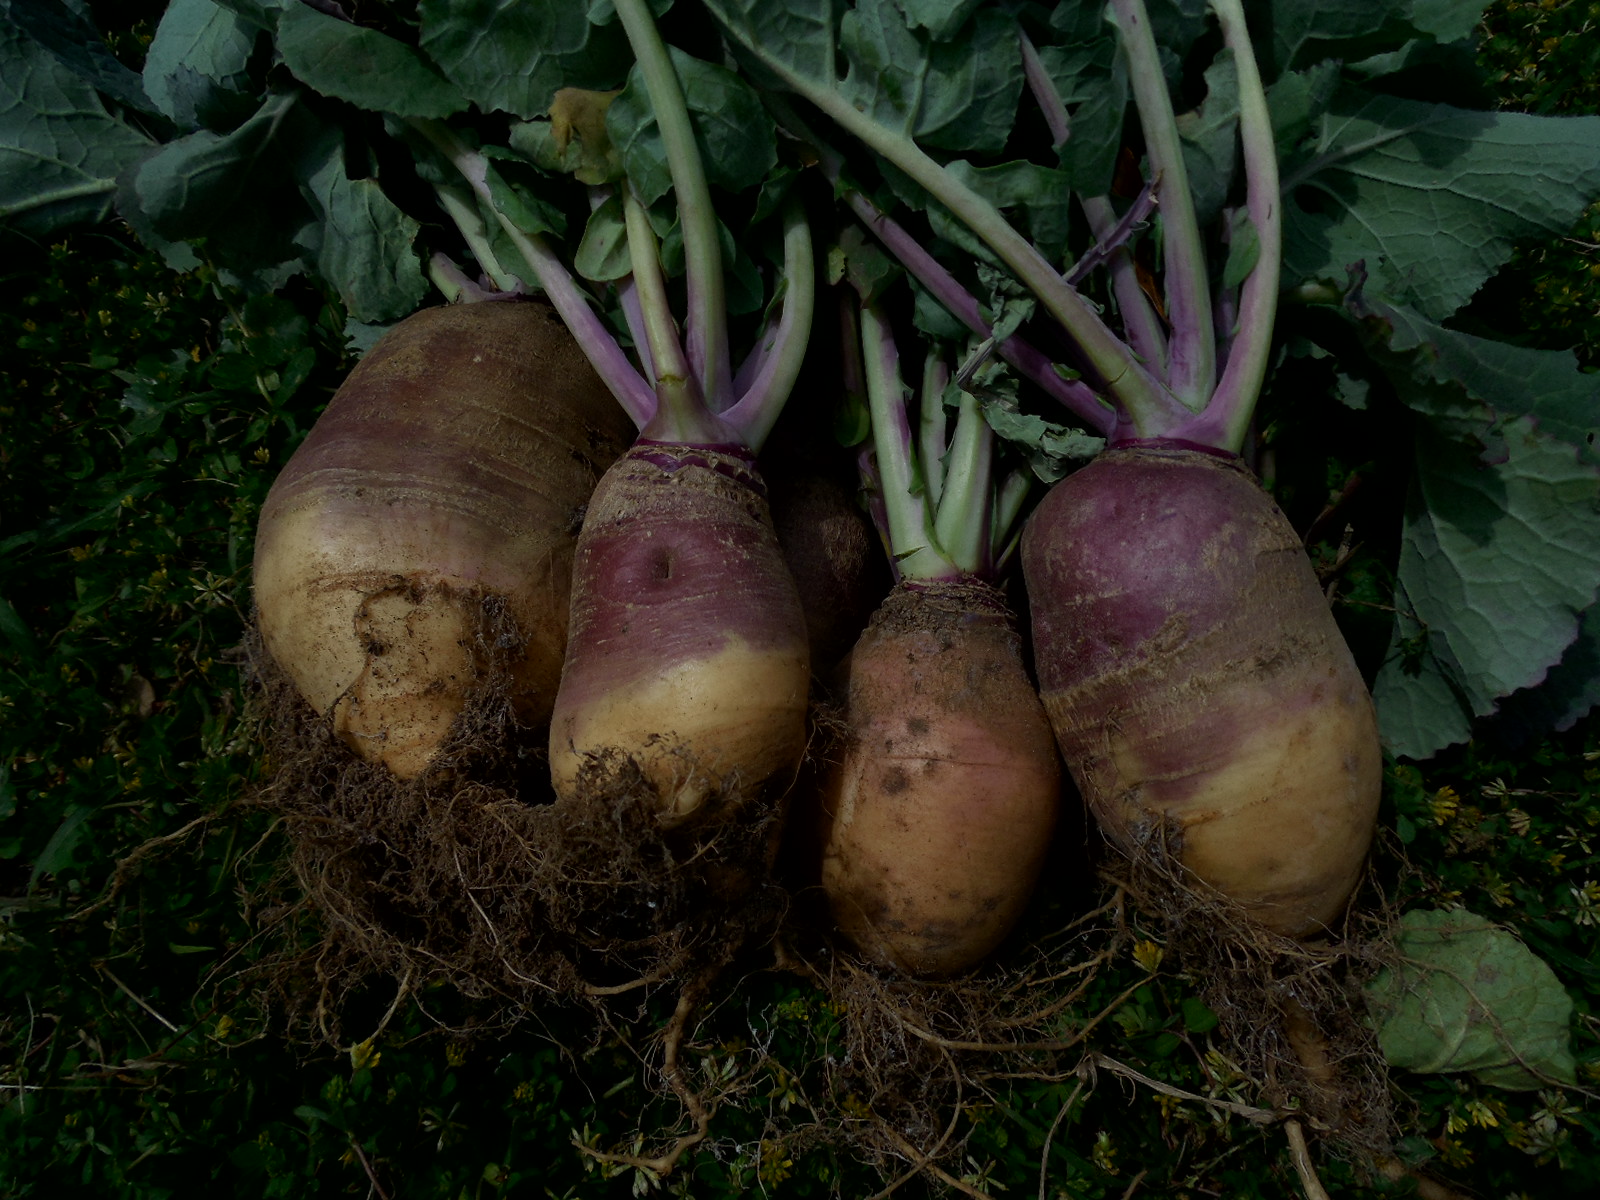
Composting is a great way to take what some might consider waste from the kitchen and yard and turn it into a valuable resource. I use mine to amend planting holes, side-dress plants, and to start seeds. Compost is the best amendment for a sandy Florida backyard garden.

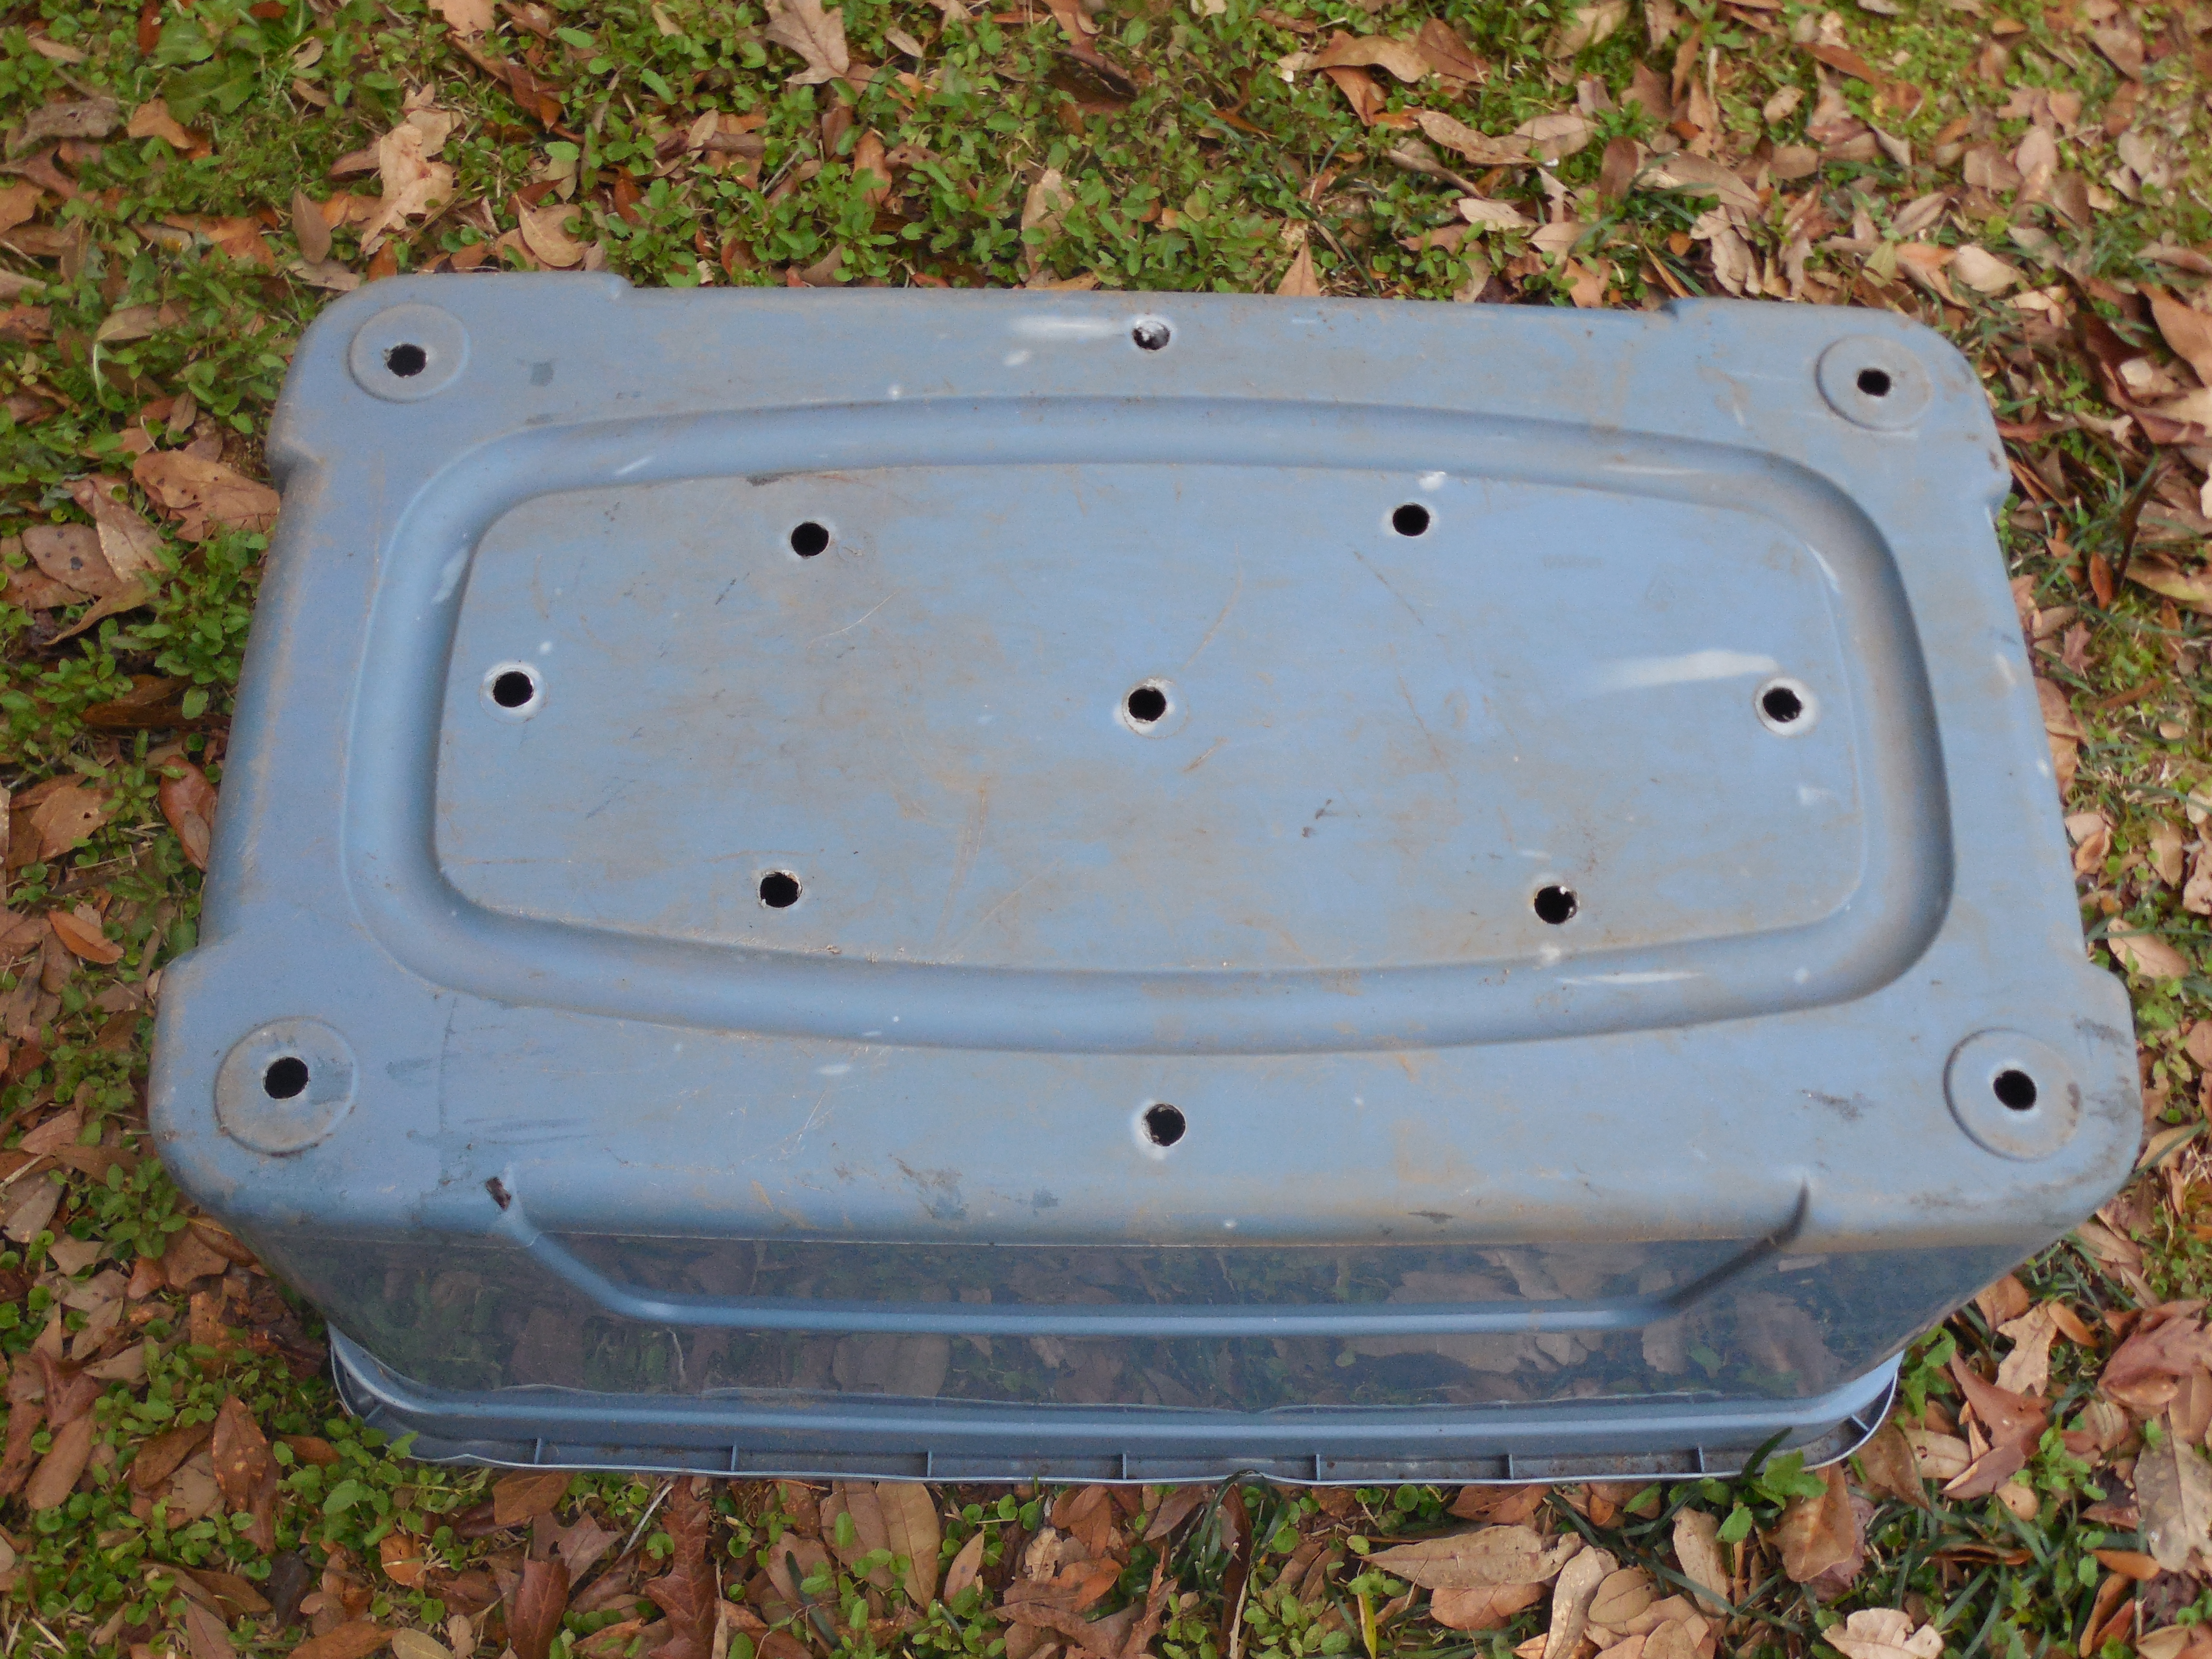
If having a three-sectioned composting system intimidates you, you may be comforted by knowing that I did not start out with a three-sectioned composting system. I started composting in a plastic tote like this one.

DSCN3838

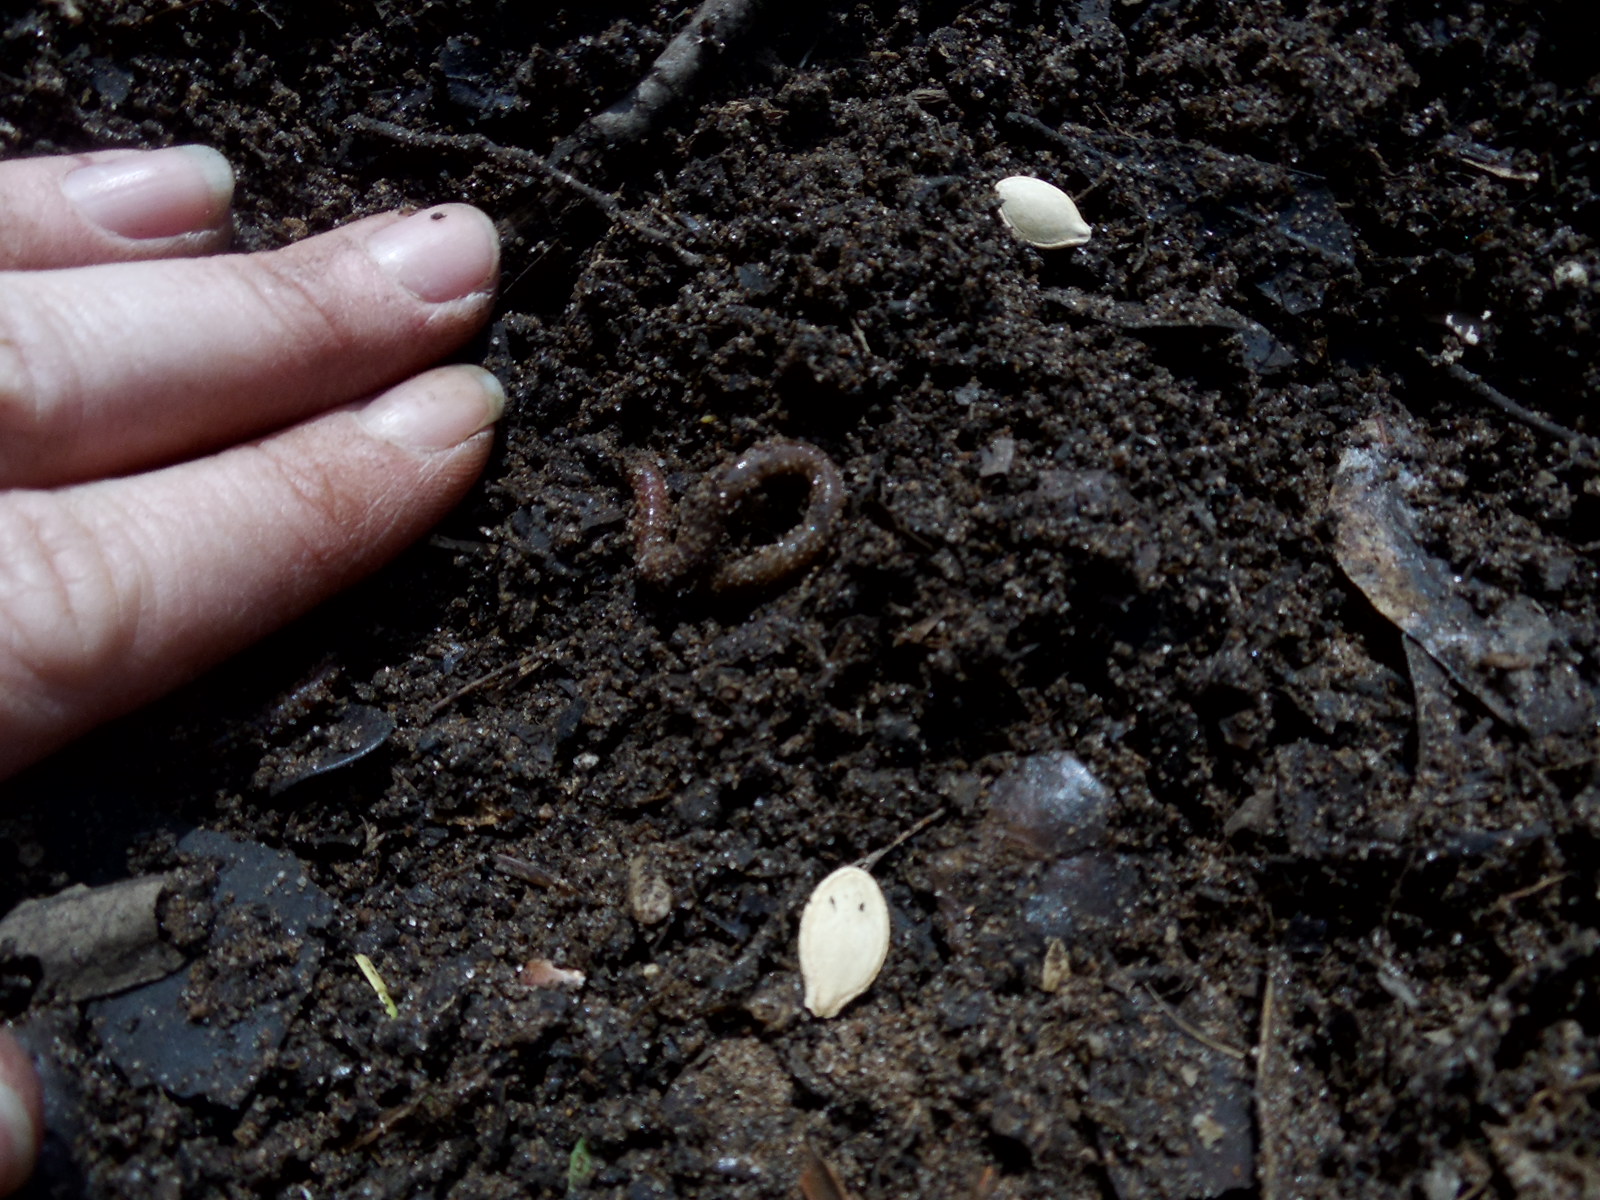
I drilled holes in the bottom for drainage and added my materials to the bin. I added some soil and earthworms from my backyard. Occasionally I would turn the contents. I was so impressed by the dark, rich compost that I decided that I needed to make much more, and the three section system was built. If you are thinking of starting to compost this year, you may want to start small.
DSCN3939

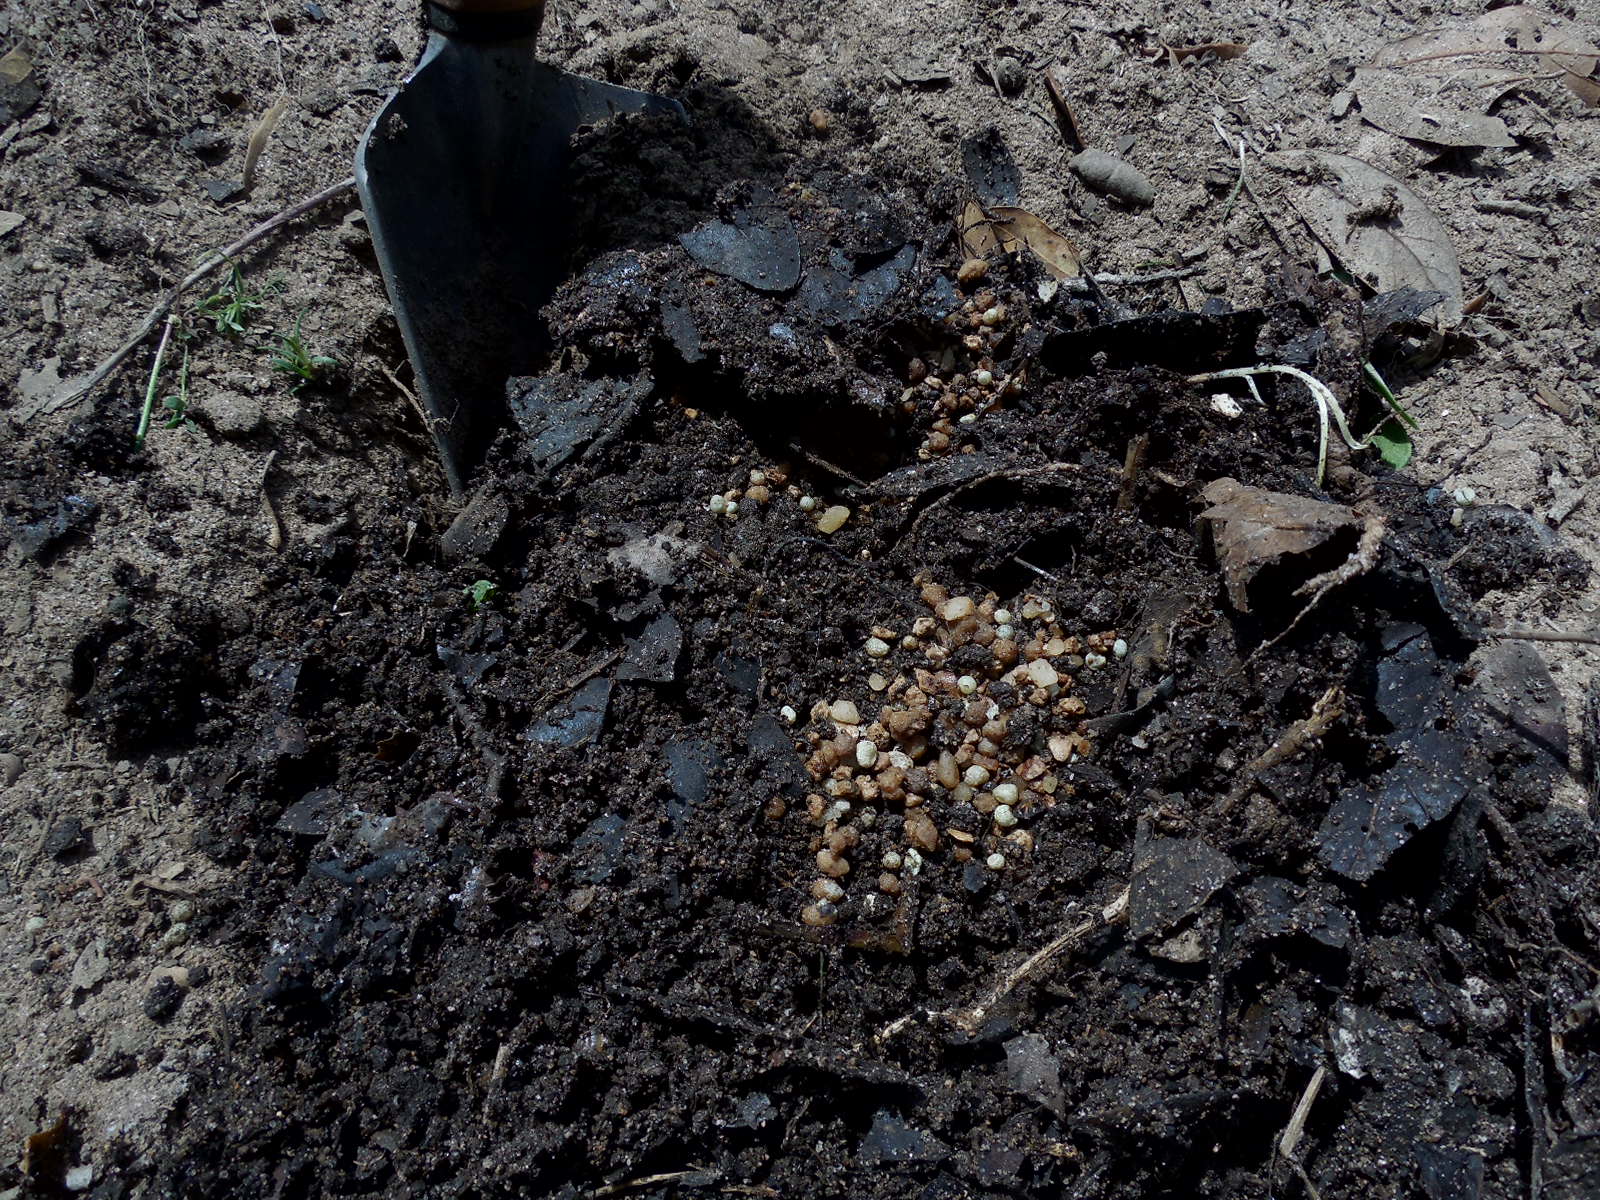
Finished compost should look like dark, rich soil. All of the original ingredients should be fully composted and it should not have an unpleasant smell. Can you see the difference in the picture between my Florida soil on the left and the rich compost on the right?

Composting is not a complicated, difficult process. Even if you just have a little garden or a small flowerbed, you can take your kitchen scraps and yard waste and turn it into a valuable addition for your Florida garden. Have you tried composting? Have you been thinking of trying it? Spring is a great time to start!

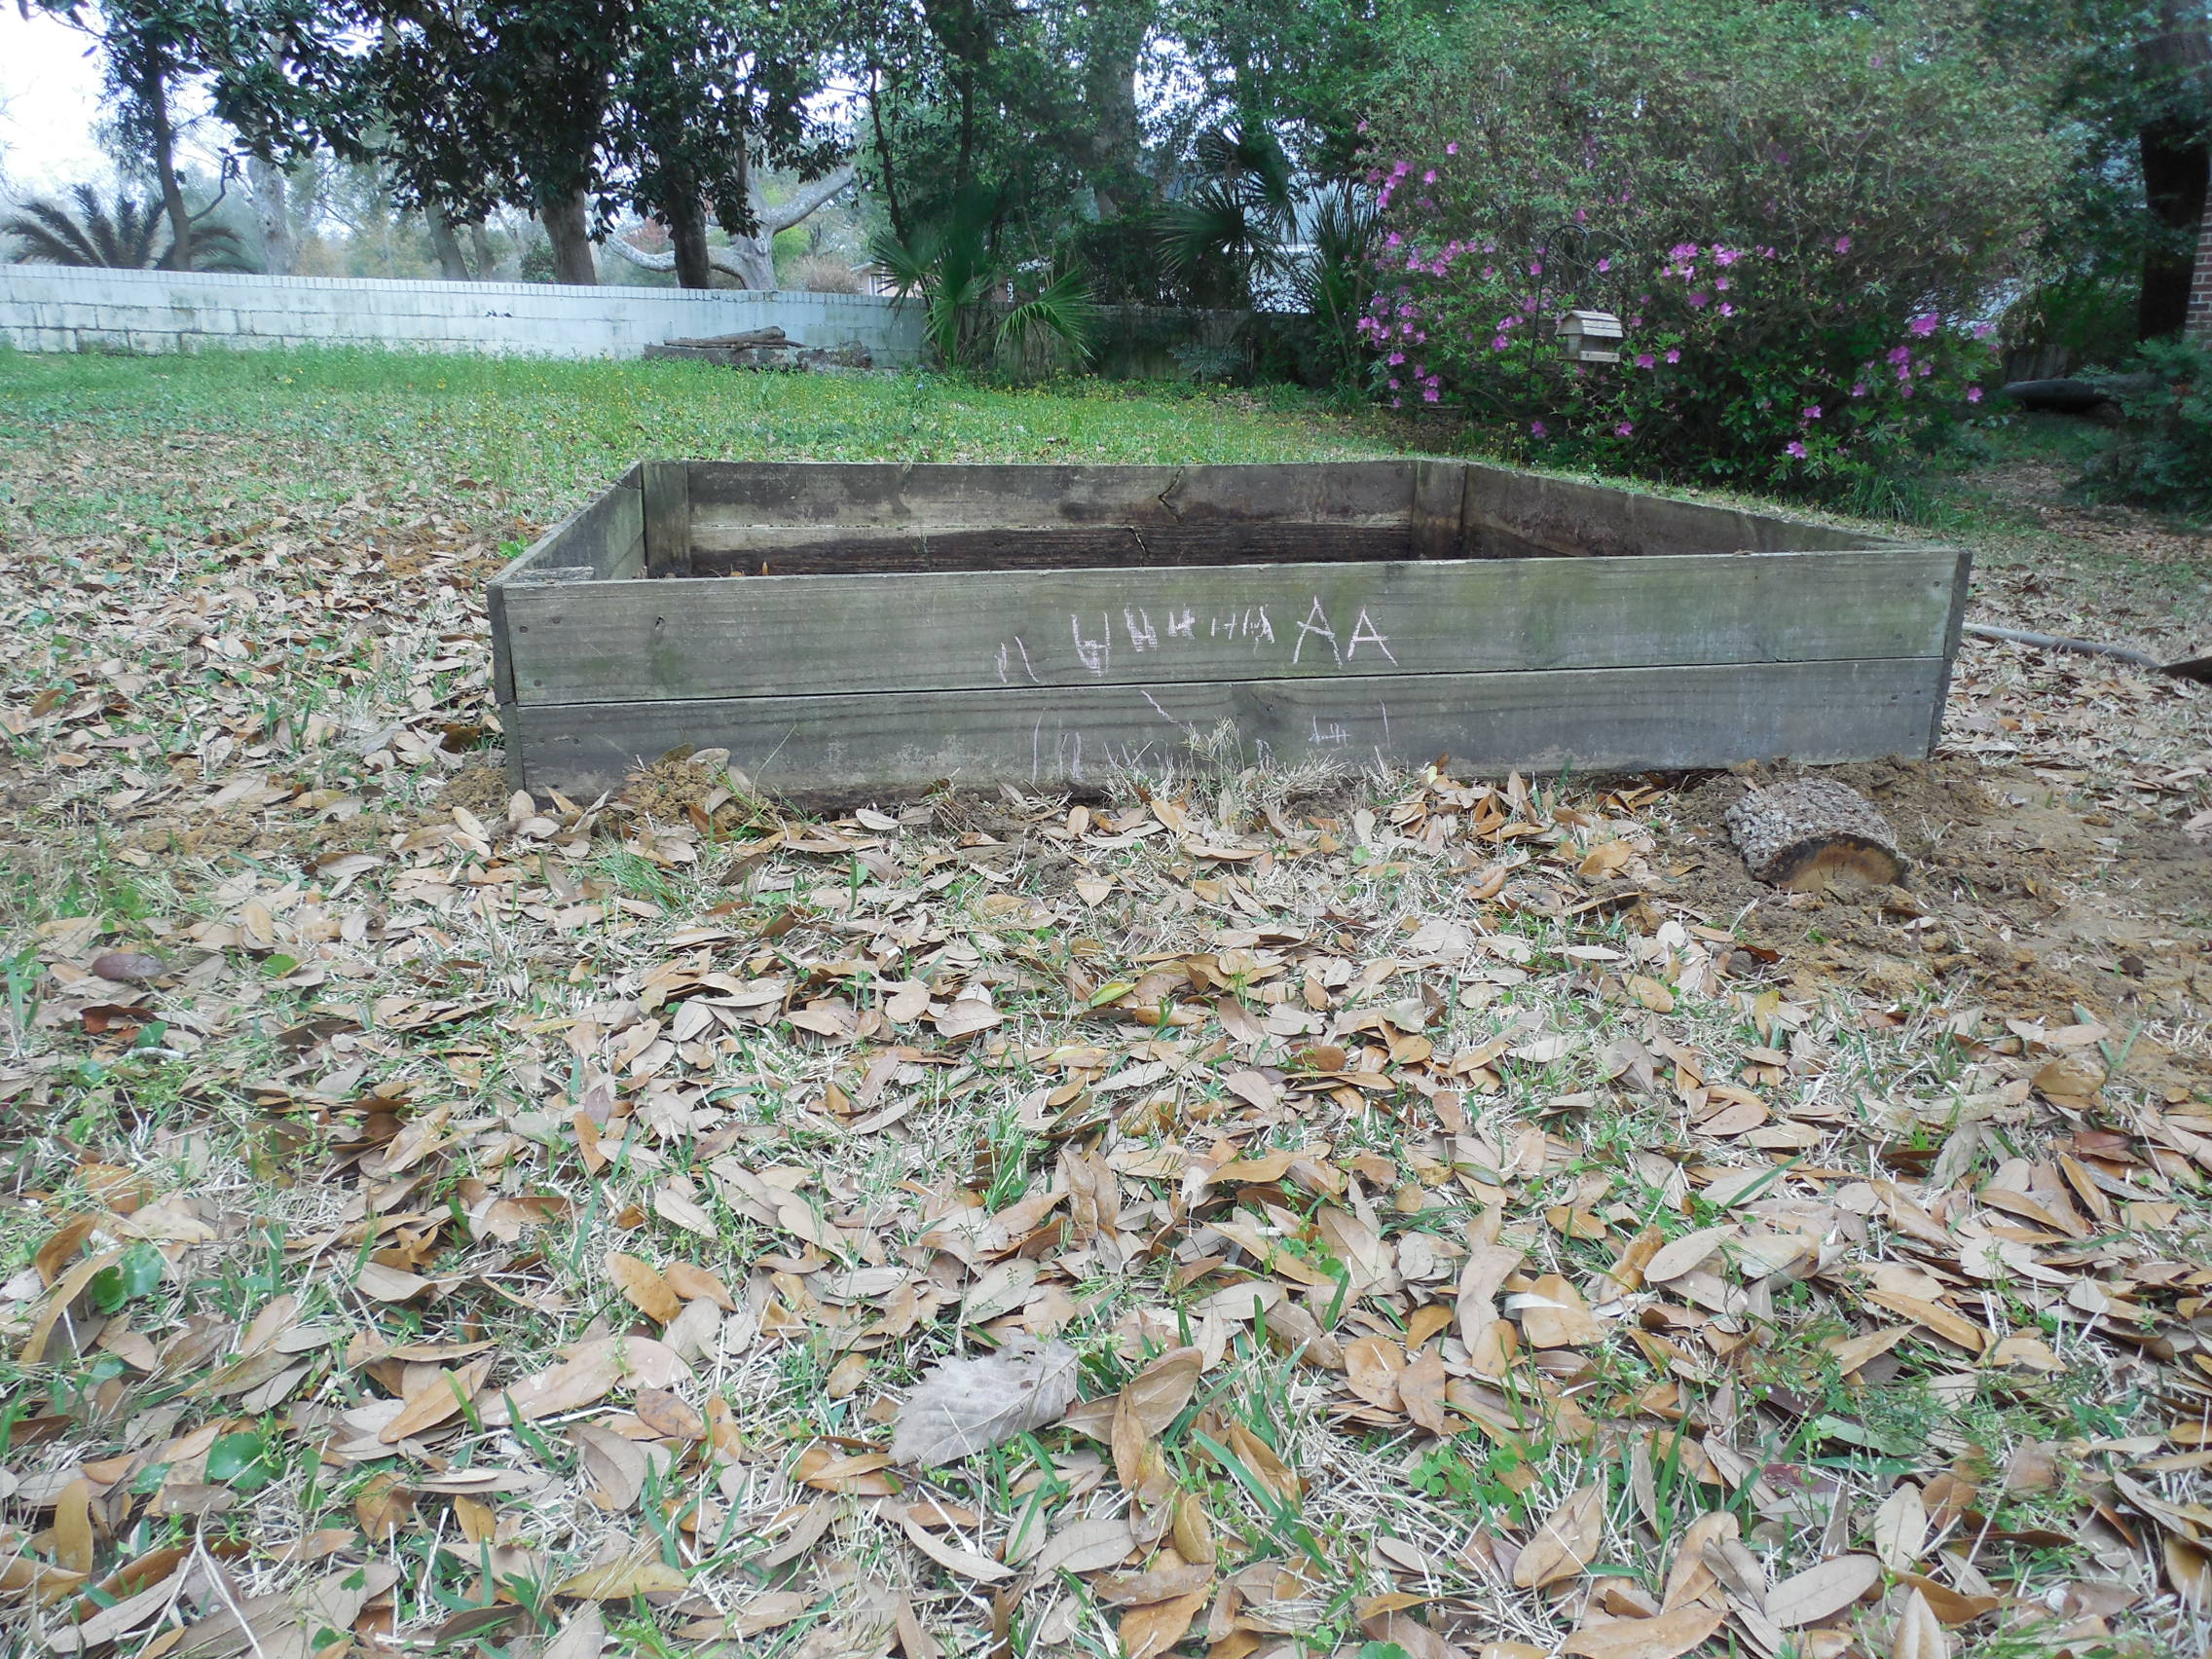
Coming soon- see how a retired couple builds a raised bed for growing vegetables, herbs, and flowers in their Florida backyard.

Coffee Filter Germination Test

Standard

Have you ever found some old seeds and thought,”I wonder if these will still grow?” Maybe you have some seeds that seem to be a bit iffy about germinating and you are wondering if you got a bad batch of seeds. Maybe you are impatient for your seeds to grow and dig around in your little pots, looking for sprouts. This method is for all 3 cases.

I have been having some difficulty with my pepper seeds germinating and I wanted to see if I had bad seeds. I also recently collected tomatillo seeds and wanted to see if they were viable before storing them. You can see how to collect your own by checking out this post.

I also admit to a bit of impatience. If I don’t get peppers started soon, I may have to buy seedlings.

A germination test that I like to do requires only a coffee filter, a baggie, and a ballpoint pen.
DSCN3871
First, cut the filter in half and label it with the variety and date. You want to know what you have in there, especially if you are testing many types of seeds. Also, the date will help you keep track of how long it has been in there.

DSCN3872

Open the filter, wet it slightly, and place the seeds on the wet filter. Close the filter and slide it into a plastic baggie. Put the baggie in a warm place. I put mine on the top shelf of my little greenhouse.

I tested ‘California Wonder’ pepper, jalepeno, and tomatillo seeds.

DSCN3900

In 5 days, many of the fresh tomatillo seeds were sprouting, and some of the peppers. The impatient gardener in me likes this method of germinating seeds. I can check on them frequently without digging them up and I can see quickly what is growing.

DSCN3901

I took the sproutlings off and planted them. I used a spray bottle to lightly water them into the soil. I can thin them later if needed, but now I know that those pesky pepper seeds have only about a 40% germination rate and that I will probably have far more tomatillo plants than I need!

Maybe I should just buy a red pepper from the grocery store and collect some seeds from it. 🙂 It’s getting close to spring planting time, though. I have wanted to try ‘Marconi’ peppers, maybe I will try some this year.

Coffee filters- good for more than just brewing coffee!

Saving Seeds From Grocery Store Tomatillo

Standard

I love the fresh taste of homemade salsa, and I am planning to make buckets of it this summer once those tomatoes are ready.

There is also salsa verde, made with tomatillos. I want to try growing some of them this year. Ripe tomatillos are sold at grocery stores, so I thought I’d try to get seeds there first.

DSCN3873
Typically, when selecting tomatillos, you should look for green fruit with the husk still attached. I wanted mine to be as ripe as possible so the seeds would hopefully be mature. I selected this sad specimen.

DSCN3874

I peeled it to reveal a spongy interior studded with little tan seeds.

DSCN3875

Then I chunked the tomatillo and squeezed the seeds and some of the pulp into water. Repeatedly rinsing and pouring off the pulp and “floaters”(I assumed the floating seeds were not viable) left me with clean seeds at the bottom.The picture above was taken about halfway through the rinsing process.

DSCN3878

After pouring off most of the water, I poured the seeds onto a napkin to dry. When they are completely dry (a day or so) I can store them!

Seems like it is time to make some of my pretty seed packets-tutorial coming soon!

Also, I guess I’d better check the germination on these little seeds. See how I do this using a coffee filter in my post here.

Have you ever grown anything from grocery store produce?

Why I Mulch

Standard

I’ve discovered that you must either mulch, or you must weed. I mulch because I hate weeding.

Thickly applied mulch shades out the weeds that may need sun to germinate. Others that manage to germinate will grow weak and spindly reaching up through the mulch to the light, making them easy to pull.

If mulch’s only function was to  curtail the growth of weeds, it would be enough to recommend it to me. However, mulch can also shade the roots of plants, supply organic material to enrich sandy soil, and help to create an uniform appearance.

DSCN3918

Some good kinds of mulch are wood chips, pine straw, straw, dried leaves, and compost. I use dried leaves because I can get them for free. I was out in my yard this afternoon in my trusty garden shoes, raking leaves, trying to discourage the weed seeds that may be enjoying the warmer temperatures and light showers.

This is a great time of year in north Florida to find leaves bagged by the side of the road or to rake them from your own yard. Mulch now for less weeding later!


Resources for North Florida Gardeners

Standard

Did you know that Florida has 4 gardening zones? This climate diversity and the variable weather makes planting times incredibly important. If you plant too early, your plants will have trouble germinating. Those that do germinate will struggle along until the warmth comes. Plant too late, and your plants might be unable to handle the heat, humidity, and pests. It is important to know your gardening zone and to plan your garden accordingly. If you are used to gardening in the northern United States, you will find that many of your typical spring crops are planted in the fall here in northwest Florida.

DSCN3103

It can be confusing to read gardening books and to follow them, only to have your crops struggle because of our climate. Vegetables can be grown all year here, but there are many differences to note about gardening in Florida. You cannot follow the planting times and guidelines from many of the excellent gardening books because of how much our climate varies. Here, if you wait until Mother’s Day to plant tomatoes, you have planted seedlings when local gardeners may be waiting for theirs to ripen.

I have spent much time searching the Internet, reading books, and talking to gardeners while trying to learn how to garden here. I have put together a list of resources that have helped me figure out how to garden in zone 8b.

First, you can find your zone on this site. Seed catalogs, books  and  websites will refer to zone numbers often, so it is helpful to know your zone.

Second, I use the University of Florida’s planting calendar. If you stray too far from their planting times, you do so at great risk. Use common sense when determining when to plant, too. For example, according to their calendar, I can start planting beans in March. Because I know that beans need warmth to germinate, and that our winter has been quite cold, I am waiting until the end of March to  plant them. Their website is also an incredible resource, full of information about all kinds of agriculture: lawns, flowers, square foot gardens, and fruit trees.

Also, check with your local Extension Office. They may provide soil testing and other services.

I have found the forums on gardenweb.com to be so helpful. They have a Florida gardening forum that is quite active (remember, we can garden year-round here), a seed-starting forum, and forums for many specific flowers and vegetables.

There are also some sites and blogs that I have enjoyed reading. For us in north Florida, I have found a really good blog, The Front Yard Farmer, who grows vegetables in Niceville, Florida. He has information archived by month, so it is a good practice to check his site to see what he has done in past years. I have learned so much from reading his blog.

There are two blogs based out of central Florida that are also neat to read. Gardening in Central Florida is a blog that chronicles a garden’s progress. He is a month or so ahead of us because of his location, but whatever he is doing in the garden is typically something that we can be preparing to do in our gardens.

Another good resource from central Florida is Central Florida Gardener. She has an interesting post on how to attract butterflies to your garden and other neat posts. Her pictures are beautiful too!

There are some books that I have found very helpful for gardening in Florida. My favorite is  Month-by-Month Gardening in Florida (Tom MacCubbin), which details what to do month-by-month for all types of plants. Some of the topics covered are citrus, perennials, vegetables, bulbs, annuals, and palms. Second, I like Florida Gardener’s Resource ( Tom MacCubbin and Georgia B. Tasker). This book gives planting information about many of the plants that grow well in Florida, as well as brief month-by-month instructions. Vegetable Gardening in Florida (James M. Stephens) is another great book.  I recently discovered Organic Methods for Vegetable Gardening in Florida (Ginny Stibolt and Melissa Contreras). Even if you are not an organic gardener, this book covers many basic gardening principles that anyone can use. Check your local library to see if they have them available or buy a copy to keep for personal reference.

My favorite gardening resource is my gardening friends. The love of gardening crosses generation gaps and social classes. Once you start talking about gardening, you will be surprised at how many people are like you and love to grow plants. Some exert great effort to grow the first tomato of the season, others concentrate on growing vibrant herbs, and many grow flowers for the butterflies. We all can learn from each other.

DSCN3805

I have found gardeners to be among the most generous people I know; they are always ready to share tips, seeds, and even the harvest. Seeds and plants given to me by my garden friends seem to do so well and I have found many new favorites because of their recommendations and gifts. When I see the plant thriving in my backyard garden, it brings special memories of the giver.

I hope also that you will find this site to be a valuable resource as you garden in this wonderful state. It is my goal with coffeetocompost.com to teach you what I have learned and to show you what I am growing at a given time.

If you know of any other great resources, feel free to mention them in the comments.